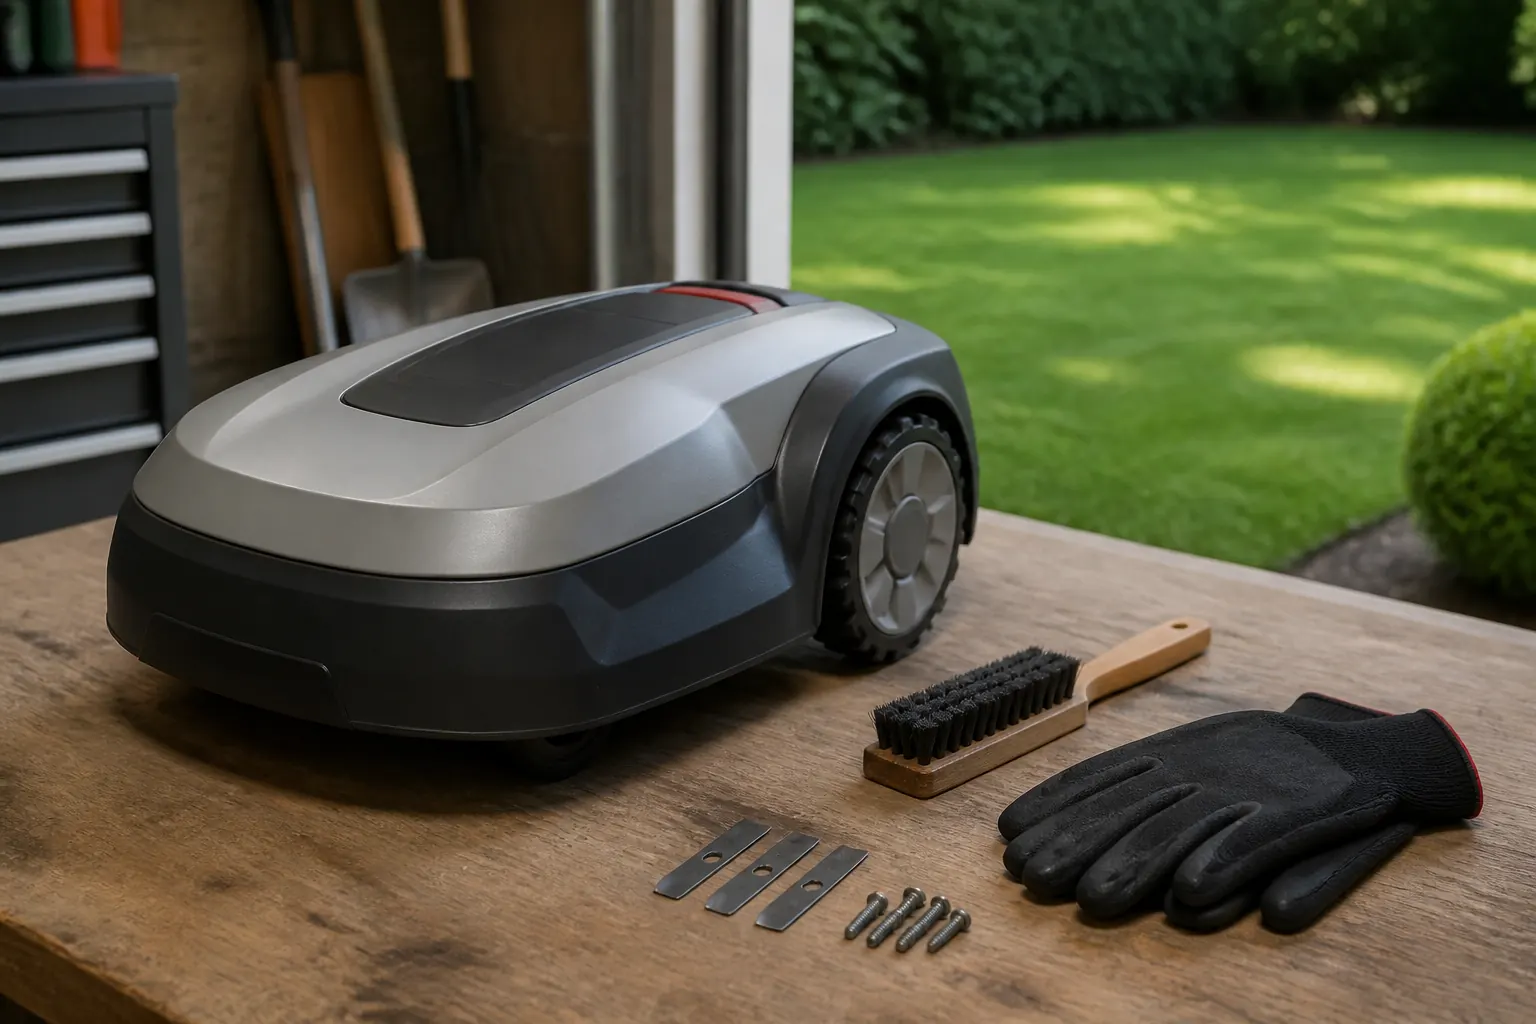
Robot lawn mower maintenance is mostly inspection, cleaning, and timely replacement of wear parts. Turn the mower fully off, wear gloves, brush grass from the wheels and cutting area, check that every blade pivots or moves as its manual describes, clean the charging contacts, and watch for shorter run time or repeated docking failures. Before winter, follow the model’s own charge and storage instructions. Battery rules and wash-down ratings are not universal.
Disclosure: This page contains affiliate links. As an Amazon Associate, Yard Foundry earns from qualifying purchases.
This guide is a research-based maintenance framework, not a substitute for the operator’s manual. Yard Foundry has not serviced or tested the models mentioned in the cited manufacturer guidance. Your manual controls blade type, screw torque, safe lifting, water exposure, battery storage, and which repairs belong with a dealer.
A practical robot mower maintenance schedule
| Interval | Checks | Act when |
|---|---|---|
| Each yard walk | Branches, toys, wire, holes, wet areas, loose boundary pegs | Remove hazards before the schedule starts |
| Weekly during active growth | Blades, blade disc, wheels, chassis, charging contacts | Grass buildup, damage, drag, vibration, or poor cut appears |
| Monthly or after severe weather | Docking path, station level, cable ends, virtual map, fasteners | Docking fails, zones shift, or hardware moves |
| End of season | Deep clean, blade set, battery charge, storage, power supply, log | Grass growth stops or frost and saturated turf make mowing unsuitable |
The calendar is only a starting point. Sandy soil, twigs, cones, long operating hours, wet growth, and a large lawn can shorten blade life or increase cleaning. A small dry lawn may need less attention. Inspect the result and the machine rather than replacing parts on an arbitrary date.
Make the mower safe before touching the underside
Use the mower’s full power-off procedure, not just the stop button or a pause in the app. Wait for the cutting disc to stop. Wear protective gloves and place the mower on a clean, stable surface in the orientation the manual specifies. Some models have a removable safety key or a main switch; others use a menu command.
Do not reach under a mower that can restart. Keep children and pets away from the work area, and do not bypass lift, tilt, collision, or stop sensors. If the body is cracked, the blade disc is damaged, or the mower shows an electrical fault, stop routine maintenance and use an authorized service route.
Clean grass without forcing water into the wrong model
Dry brushing is the safest common method. Remove loose clippings by hand while wearing gloves, then use a soft brush around the wheels, blade disc, skid plate, and chassis. Wipe the body with a damp cloth. Clear leaves and stems from the charging station so the mower can enter without riding over debris.
Husqvarna’s current cleaning instructions allow a garden-hose rinse on some named models but prohibit a pressure washer on the mower and station. Other models should not be cleaned with running water at all. Check the exact manual or support page before using a hose. An enclosure rating on a sales page is not permission to pressure wash bearings, seals, contacts, or the charging base.
Grass packed around drive wheels can reduce traction on slopes and change how the mower approaches its station. Grass wrapped around the cutting assembly adds drag. Clean more often during fast spring growth or wet periods, but avoid mowing saturated turf merely to keep the schedule full.
Inspect and replace the blade set
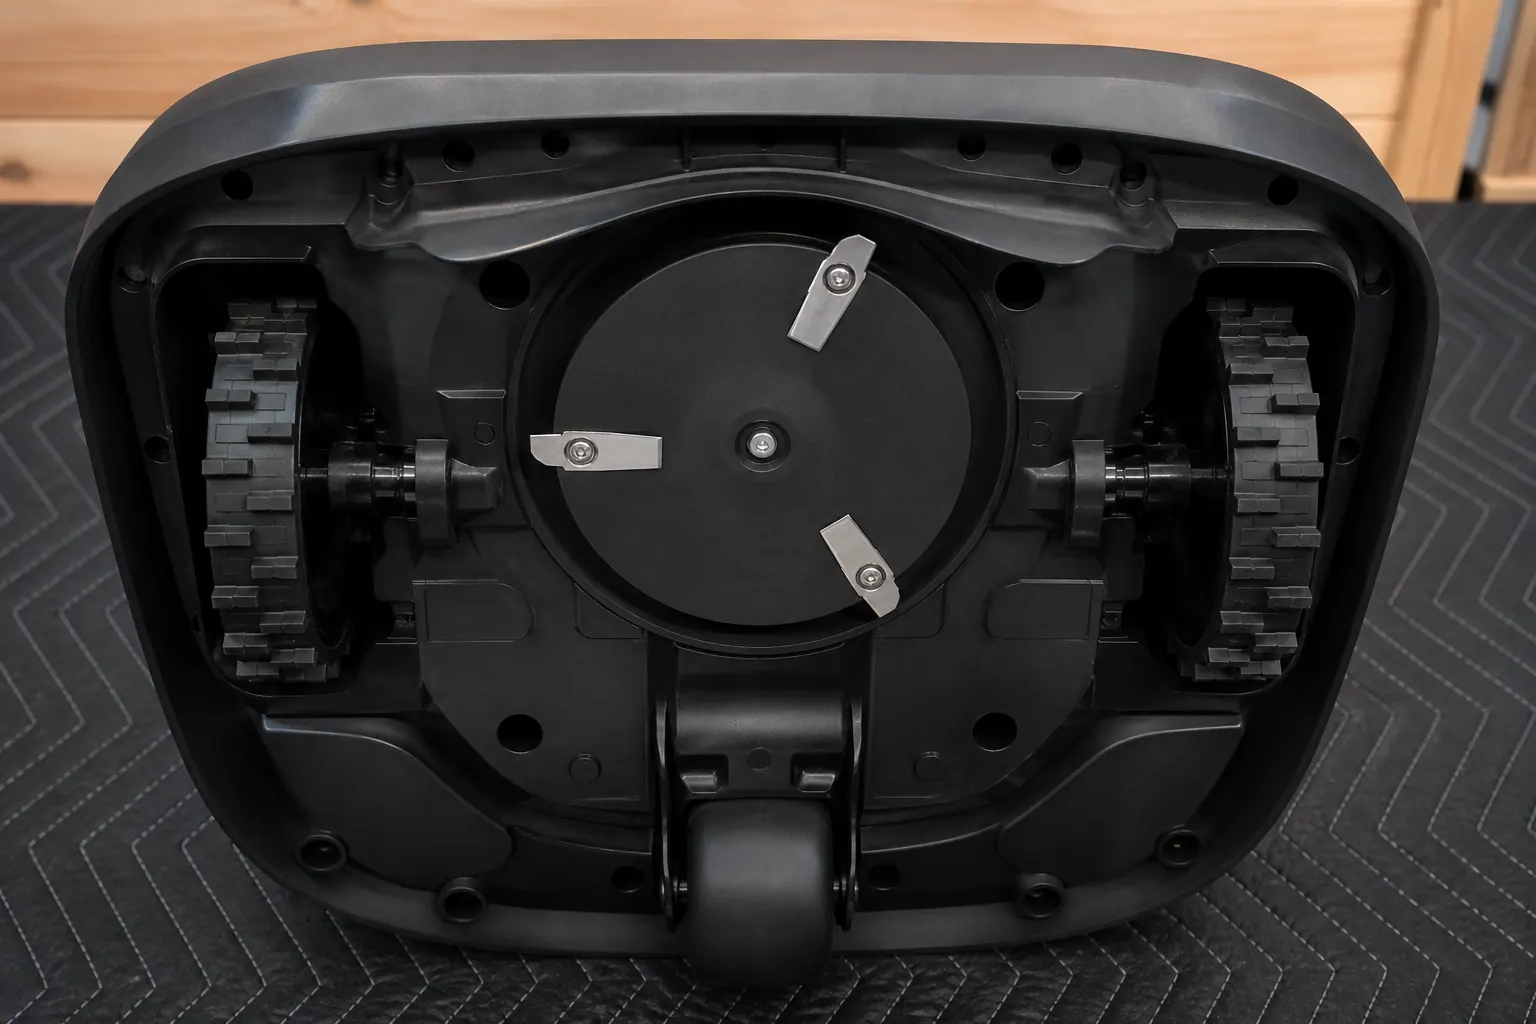
Look for rounded edges, chips, bends, corrosion, and grass fibers torn rather than cut. Also listen. New vibration or a rough mechanical sound can indicate an unbalanced set, damaged disc, loose hardware, or debris. Stop the mower until the cause is found.
Small pivoting razor blades should move freely after installation if that is how the model is designed. Husqvarna’s blade guidance says to replace each blade with a new screw, replace the full set rather than mixing old and new parts, and confirm free movement. Its instructions apply to Automower products, but the underlying lesson is broader: use the exact blade, fastener, count, and procedure listed for your mower.
Do not sharpen a disposable blade unless the manufacturer specifically permits it. Changing its mass or shape can unbalance a high-speed disc. Do not substitute a similar-looking screw. Thread form, head profile, strength, coating, and retention method may differ.
- Power the mower off by the manual and put on gloves.
- Photograph or note the original blade orientation if the manual is unclear.
- Clean the cutting area before opening the fasteners.
- Replace the complete blade and screw set with compatible parts.
- Verify movement, clearance, and disc rotation by hand as instructed.
- Record the date or operating hours and reset the service counter if equipped.
Compare robot lawn mower blade and maintenance kits on Amazon (paid link). Match the exact mower model and part number, then confirm whether new screws are included.
Check wheels, contacts, and the charging station
Spin accessible wheels by hand with the mower off. They should move as the manual describes without grinding, severe wobble, or binding. Remove compacted mud from tread grooves. A mower that slips, turns unevenly, or repeatedly digs at an edge may have dirty wheels, a worn tire surface, an installation problem, or a drive fault.
Charging contacts need a clean, dry mating surface. Disconnect the station power before cleaning it. Use only the contact-cleaning method approved by the maker. Some Husqvarna instructions mention fine emery cloth for its plates, but that is not a universal method for plated or spring-loaded contacts. Aggressive abrasion can remove a protective finish.
Confirm that the station remains level and the approach has not sunk or grown over. Loose low-voltage connectors, corrosion, displaced guide wire, or a new obstacle can look like a battery fault because the mower spends extra time searching or fails to make electrical contact.
Read battery behavior instead of guessing its age
Useful clues include a sharp reduction in mowing time between charges, more frequent returns to the station, stopping before reaching the dock, or a battery diagnostic code. First rule out dull blades, grass drag, blocked wheels, poor contacts, a changed schedule, and route problems. Those issues increase energy use or make charging unreliable.
Battery replacement is not a casual first step. Many packs are enclosed, electronically managed, and meant for authorized service. Use the model’s diagnostic screen or service process. Do not open, puncture, heat, or rebuild a lithium-ion pack without the training and equipment required for that product.
The robot mower ownership cost calculator can include a battery allowance, blades, electricity, and service. Treat the battery interval as a scenario, not a promised lifespan. Climate, operating hours, charging behavior, and cell management change the result.
Prepare the mower for winter storage
Stop regular mowing when grass growth slows and frosty or saturated conditions make operation unsuitable. Clean and inspect the mower before storing it so wet clippings and hidden damage do not sit for months. Replace worn blades now or leave a dated note for spring, depending on the maker’s recommendation.
Husqvarna’s current US winter guide recommends a full charge before shutdown and dry indoor storage above freezing for its Automower range. It also says most current models do not need charging during storage, while some older models need a charge every three months. That difference is why a generic reminder to “top it up all winter” can be wrong. Follow the manual for the serial range and battery system in front of you.
Store the power supply as directed, label disconnected boundary and guide wires, and protect approved cable ends from moisture. Some baseplates or reference stations are rated to remain outdoors, while others should come inside. Keep a GNSS reference station in its exact mounted relationship if removing it would force the virtual map to be rebuilt.
Do not store the mower near fertilizer, pool chemicals, dripping fuel, or a heat source. Leave it on its wheels or approved wall bracket rather than balancing it on the body. Note the PIN, app access, security setting, and storage location without taping a code to the machine.
Maintain the installation as well as the mower
For a wired system, walk the boundary after edging, aeration, construction, or animal digging. Look for exposed or tight wire, loose pegs, and new sharp bends. Do not cut into the lawn blindly when repairing a suspected break. The robotic lawn mower installation guide explains boundary and wire-free setup, while the boundary wire versus wire-free comparison covers ownership tradeoffs.
For a virtual-boundary mower, check app updates, map changes, reference-station alignment, tree growth, and new structures that affect satellite view or wireless communication. Do not install firmware immediately before leaving the property for a long period. Update when there is time to watch a complete docking and mowing cycle.
Slopes deserve a seasonal check because erosion and wheel ruts can change them. Use the robot mower slope calculator to convert rise and run, then compare the result with the mower manual. A published maximum is not a promise that muddy, narrow, or obstacle-filled slopes will work reliably.
When dealer service is the sensible choice
- Cracked chassis, damaged cutting disc, or repeated safety-sensor faults
- Battery swelling, heat, odor, leakage, or physical damage
- Water entry, corrosion inside the body, or failed sealing
- Grinding drive noise, wheel play, or repeated motor overload
- Charging faults that remain after approved contact and connection checks
- Firmware, cellular, or security faults that block normal operation
Annual dealer service is optional for some owners and required by some maintenance plans. Current Husqvarna service information lists cleaning, software updates, blade replacement, battery testing, charging, safety tests, and functional checks among typical Automower service tasks. Ask what the local service actually includes before paying for a package.
Keep a small maintenance log
Record operating hours if available, blade changes, error codes, battery observations, cable repairs, firmware version, and winter charge state. A one-line note after each task makes patterns visible. If run time drops after a blade change, for example, the new hardware, disc movement, and grass buildup are easier to check before assuming the battery failed.
Buying the right machine still matters more than polishing a poor fit. The robotic lawn mower buying guide covers lawn shape, slopes, navigation, charging, and service access. Maintenance stays manageable when parts, manuals, and local support were part of the original choice.
A weekly five-minute inspection catches most routine issues early. Keep the underside clean, replace the full blade set as specified, treat charging faults as a system problem, and use the exact winter instructions for the model. That is enough structure for good ownership without inventing a universal service calendar.