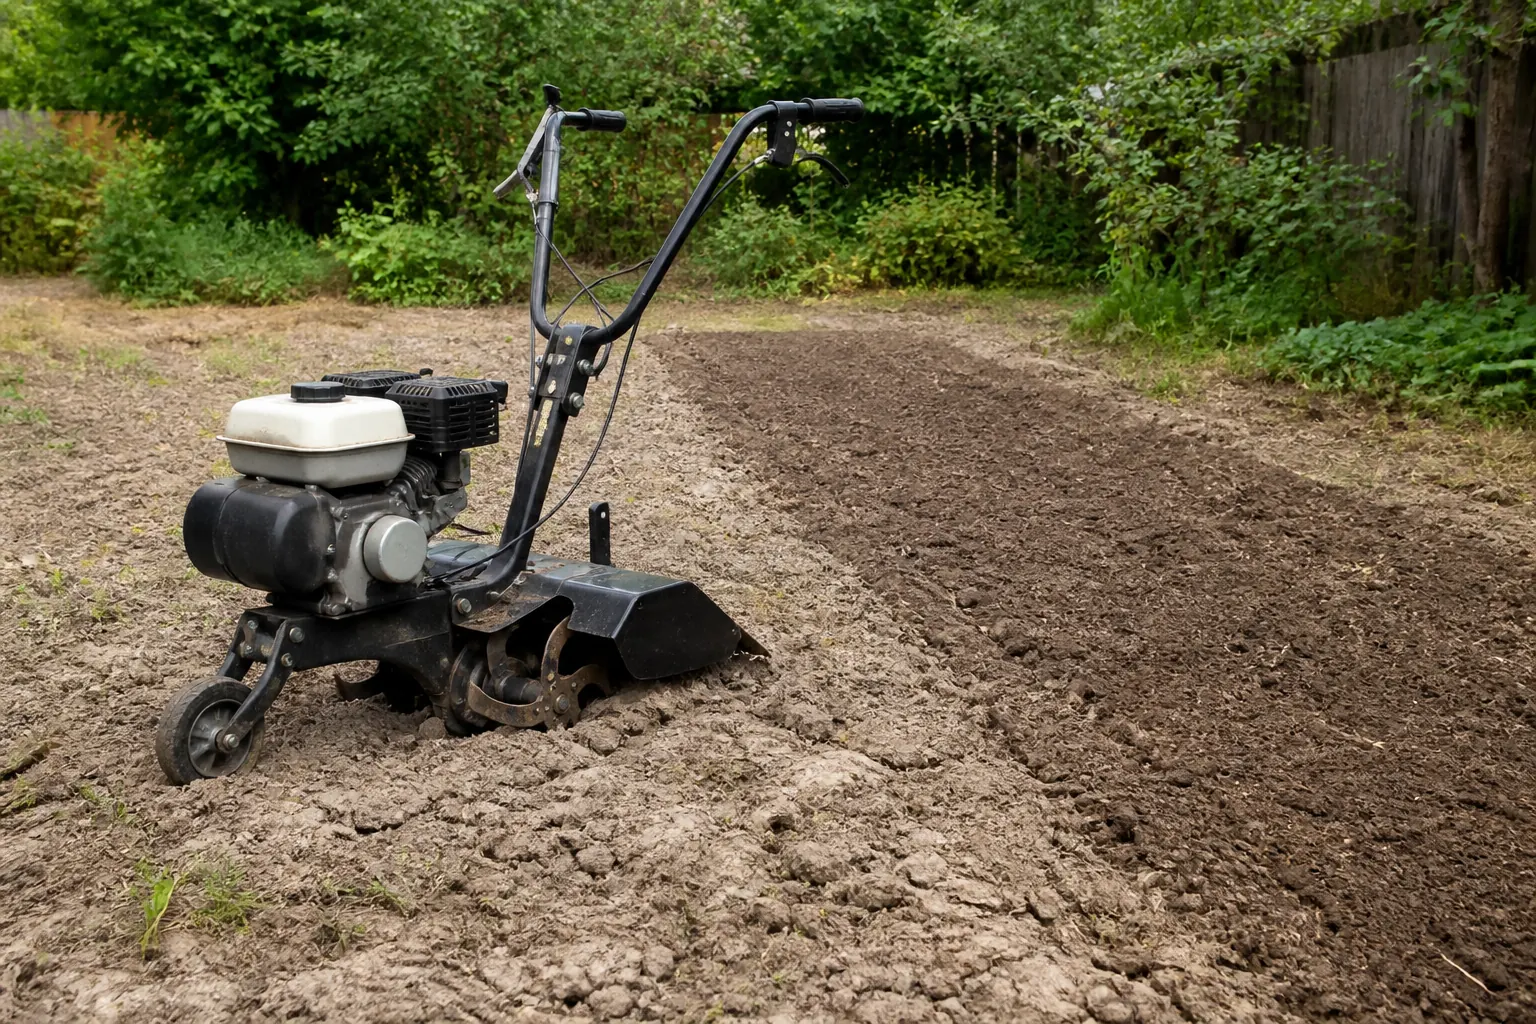
To learn how to till hard soil safely, begin before the engine starts. Identify buried lines and debris, check moisture at the intended working depth, remove rocks and roots you can see, and set the machine for a shallow first pass. Let the tines take small bites. Deepening the cut over several passes is slower than forcing the handles, but it protects the operator, the transmission, and the soil structure.
Disclosure: This page contains affiliate links. As an Amazon Associate, Yard Foundry earns from qualifying purchases.
A hard surface is not always compacted soil. Dry clay can be nearly impenetrable and then become workable after controlled moisture. Wet clay may feel soft underfoot but turn into dense clods when tilled. Sod, gravel, construction fill, and a buried traffic pan each need a different response. Dig a small inspection hole before choosing the machine.
How to till hard soil: the safe sequence
- Locate utilities and inspect the area for irrigation, wire, roots, stone, and metal.
- Test soil moisture from the surface down to the planned tilling depth.
- Mow or cut tall vegetation and remove stringy vines that can wrap around tines.
- Read the exact tiller manual and complete its pre-use checks.
- Set a shallow first cut and an appropriate ground or tine speed.
- Make a straight pass without pushing the machine beyond steady progress.
- Stop the engine before clearing a jam, inspecting tines, or crossing a hard surface.
- Lower the depth in small steps and change pass direction only when the manual permits it.
Honda’s current tilling guidance recommends a simple cycle: evaluate the soil, set the tiller for those conditions, work a short section, inspect performance, then reset the controls. That short test strip tells you more than a universal throttle or depth rule because front-tine, mid-tine, and rear-tine machines behave differently.
Wait for the right moisture
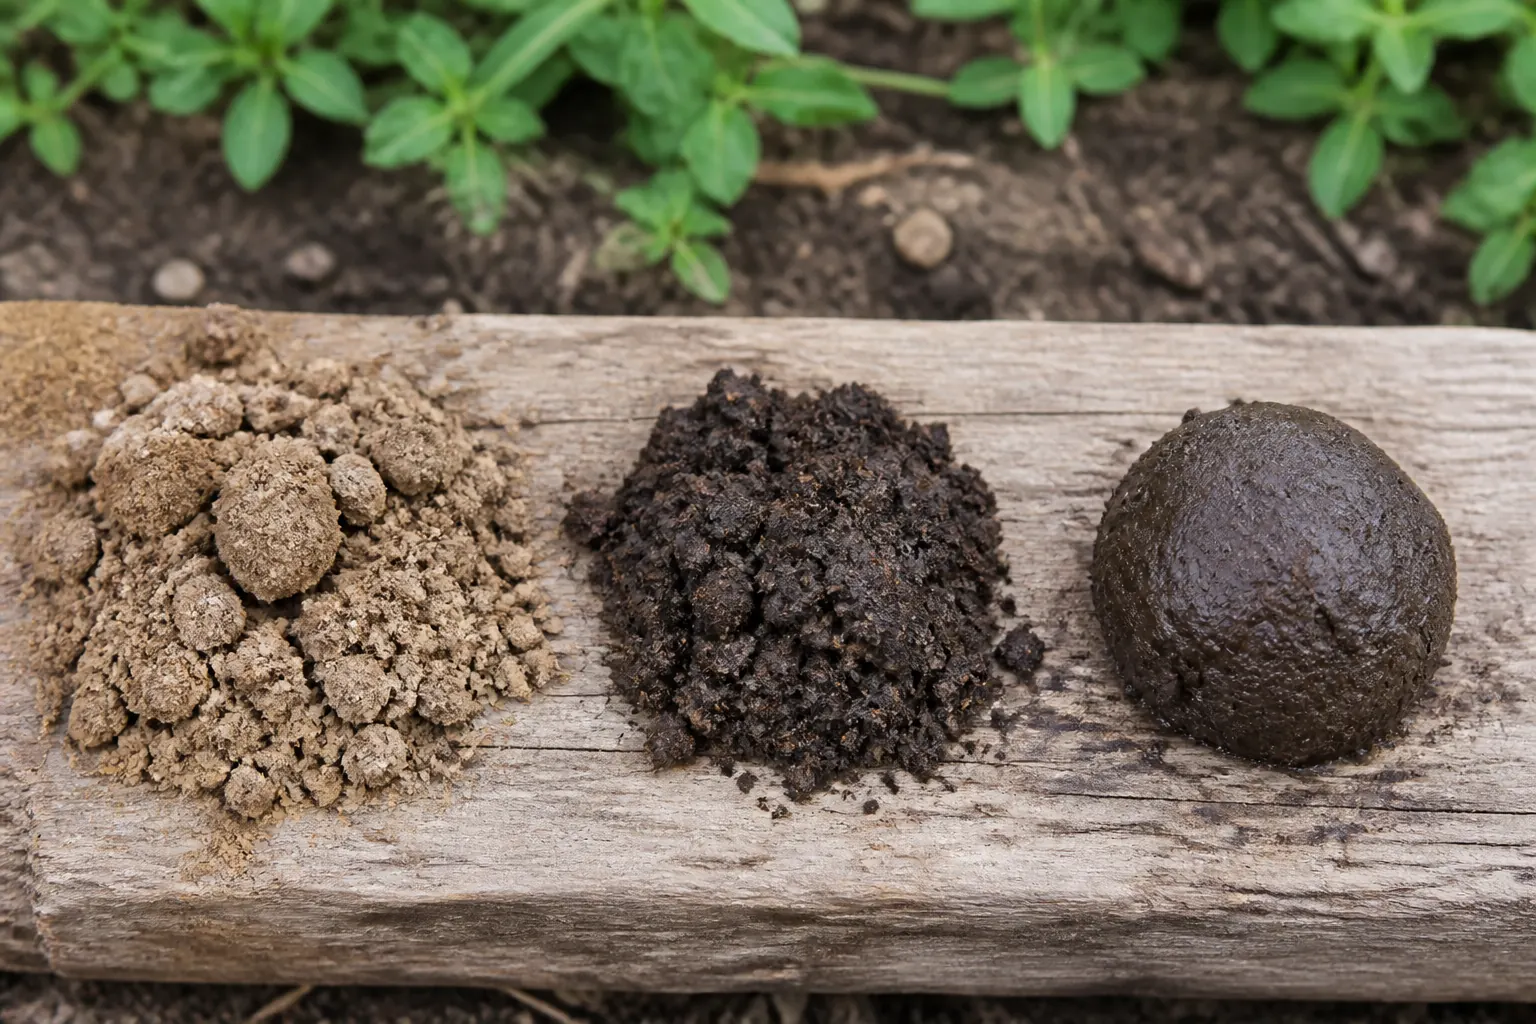
Take samples from several locations at the depth the tines will reach. Squeeze each sample. Soil that stays molded into a tight, slick ball is too wet. Soil that falls apart into hard dust may be too dry for efficient ground breaking. The workable middle crumbles into irregular pieces with light finger pressure.
University of Minnesota Extension advises against preparing soil when it is too wet or too dry. Oregon State University Extension gives the same practical warning: tilling wet soil produces clods and compaction, while a freely crumbling sample is ready to work. Checking only the sun-baked surface can be misleading. Clay two inches down may still be plastic and wet.
If the ground is bone dry, water it lightly and evenly, then wait for moisture to move into the planned working layer. Do not flood the site immediately before tilling. The exact wait depends on soil texture, weather, and irrigation depth. Dig again and repeat the squeeze test.
Choose a machine that can control the cut
A light cultivator is useful in already loosened soil. It often bounces on hard, unbroken ground because it lacks weight and traction. A self-propelled rear-tine machine gives the operator more control on a larger new plot, but it is heavy to transport and can still buck when set too deep.
Use the tiller versus cultivator comparison to separate ground breaking from shallow cultivation. If a rear-tine machine fits the job, the rear-tine tiller guide explains counter-rotating and forward-rotating tines, wheel drive, depth control, and transport concerns.
Renting is often sensible for a one-time garden conversion. Delivery can be worth paying for because a large tiller needs ramps, tie-down points, and a vehicle rated for the load. Compare realistic use and transport costs with the rear-tine tiller rent versus buy calculator.
Prepare the site before the first pass
Call the local utility-location service before disturbing a new area, then identify private systems that public marking may not cover. Private irrigation pipe, low-voltage lighting cable, pet fencing, and drainage lines are easy to miss. A tiller is not a locating tool.
Walk the plot and remove stone, wire, landscape staples, hose, branches, and debris. Cut fibrous vines and long grass close to the surface. Do not put hands or feet near tines to pull wrapped material. Shut the machine down by the manual, disconnect its starting source where directed, and wait for all movement to stop.
Mark a turning zone at each end. Keep children, pets, and observers away. Wear the eye protection, footwear, hearing protection, and other equipment specified by the maker. Guards and shields stay installed.
Make the first pass shallow
Set the depth control for a light cut. On many hard sites that means roughly the upper inch or two, but the manual for the exact machine controls. A shallow setting lets the tines break the crust without trying to lift a full deep slice at once.
Use a steady walking pace. Do not lean hard on the handles to force depth unless the manual gives that instruction for the model and condition. Honda notes that depth-bar adjustments differ between its mini, mid-tine, and rear-tine machines. An adjustment that slows one design can make another dig differently. Generic advice cannot replace the operator’s manual.
If the tiller jumps, stop and reassess. The soil may be too dry, the cut too deep, the ground speed wrong, or the machine too light for the job. If the tines stall or the machine stops making forward progress, disengage them and follow the manual’s restart or clearing procedure. Repeatedly slamming the tines into a hidden rock is not productive ground breaking.
Deepen over several passes
Inspect the first strip. Remove exposed rock and debris with the machine off. If the soil breaks into usable chunks and the tiller remains controlled, lower the depth one step for the next pass. Several shallow passes are normal on hard ground. A Honda tiller manual notes that reaching the desired depth commonly takes more than one pass, depending on soil condition.
Change direction on later passes only if the site and manual allow it. Crossing the first pattern can break remaining clods, but steep slopes, narrow beds, or buried obstacles may rule that out. Never make a tight powered turn with buried tines unless the manual explicitly permits it.
Stop at the depth needed for the planting plan. Pulverizing soil into powder damages aggregates and leaves a surface that can crust after rain. Oregon State Extension warns that excessive or deep tilling can create a compacted layer below the worked zone and harm infiltration. A seedbed should be workable, not milled into flour.
Know when the tiller is the wrong repair
A dense layer below the tine depth may be traffic compaction or a tillage pan. University of Minnesota Extension notes that deep tillage does not deliver consistent, lasting yield gains across conditions. In a home garden, confirm the layer with a fork, probe, or inspection hole before renting a larger machine. Preventing new traffic over wet soil is part of the fix.
Tree roots are another stop. Cutting major roots can harm the tree and leave the garden competing for water. Move the bed outside the root zone rather than escalating machine power. Very rocky fill may also be a poor place for rotary work. Removing fill, building above it, or choosing another site can be safer.
A framed bed can bypass shallow bad ground when excavation is impractical. Review the raised garden bed kit guide, then calculate clean fill with the raised bed soil calculator. Do not conceal contaminated soil without an appropriate site assessment and barrier plan.
Protect the soil after tilling
Establish beds and paths as soon as the ground is prepared. Walking and wheel traffic on the loose bed can undo the work. Rake only enough to plant. Leave larger clods exposed briefly if local guidance recommends weathering them, but do not leave the whole plot bare through heavy rain.
Add only amendments supported by a soil test and appropriate for the soil. Mixing sand into clay without a sound specification can produce a denser result. Finished compost may improve organic matter and workability, but more is not automatically better. Salts and nutrients can accumulate.
Cover the surface with mulch or a planned crop after planting. Over following seasons, reduce broad tillage and use targeted hand tools where possible. Permanent paths, surface compost, and living roots can keep the repaired bed from returning to the same compacted state.
Check the machine after the job
Move the tiller onto a stable service area, shut it down, and let hot parts cool. Clean soil from the tines and guards by the manual. Inspect for bent tines, wrapped roots, loose fasteners, damaged shields, leaks, and broken shear hardware. Do not substitute an ordinary bolt for a specified shear pin. Record anything that needs repair before storage, because a fault is easier to remember now than on the next rental day or planting weekend.
Buying checklist for a hard-ground tiller
- Machine type and tine rotation suited to initial ground breaking
- Positive wheel drive and a controllable depth regulator
- Low working speed appropriate for the soil and model
- Handle position that allows control without overreaching
- Transport plan, loading equipment, and total machine weight
- Local access to shear pins, belts, filters, tines, and service
- An operator’s manual available before rental or purchase
Compare rear-tine tillers for hard soil on Amazon (paid link). Confirm the exact model’s tine direction, speeds, depth control, weight, warranty, and manual instead of relying on the listing title.
The safest pace is almost never the deepest first pass. Work a test strip, adjust one setting, and stop when the machine bucks or the soil smears. Hard ground rewards patience because the cost of rushing appears later as broken parts, compacted clods, or a damaged line underground.