Disclosure: This page contains affiliate links. As an Amazon Associate, Yard Foundry earns from qualifying purchases.
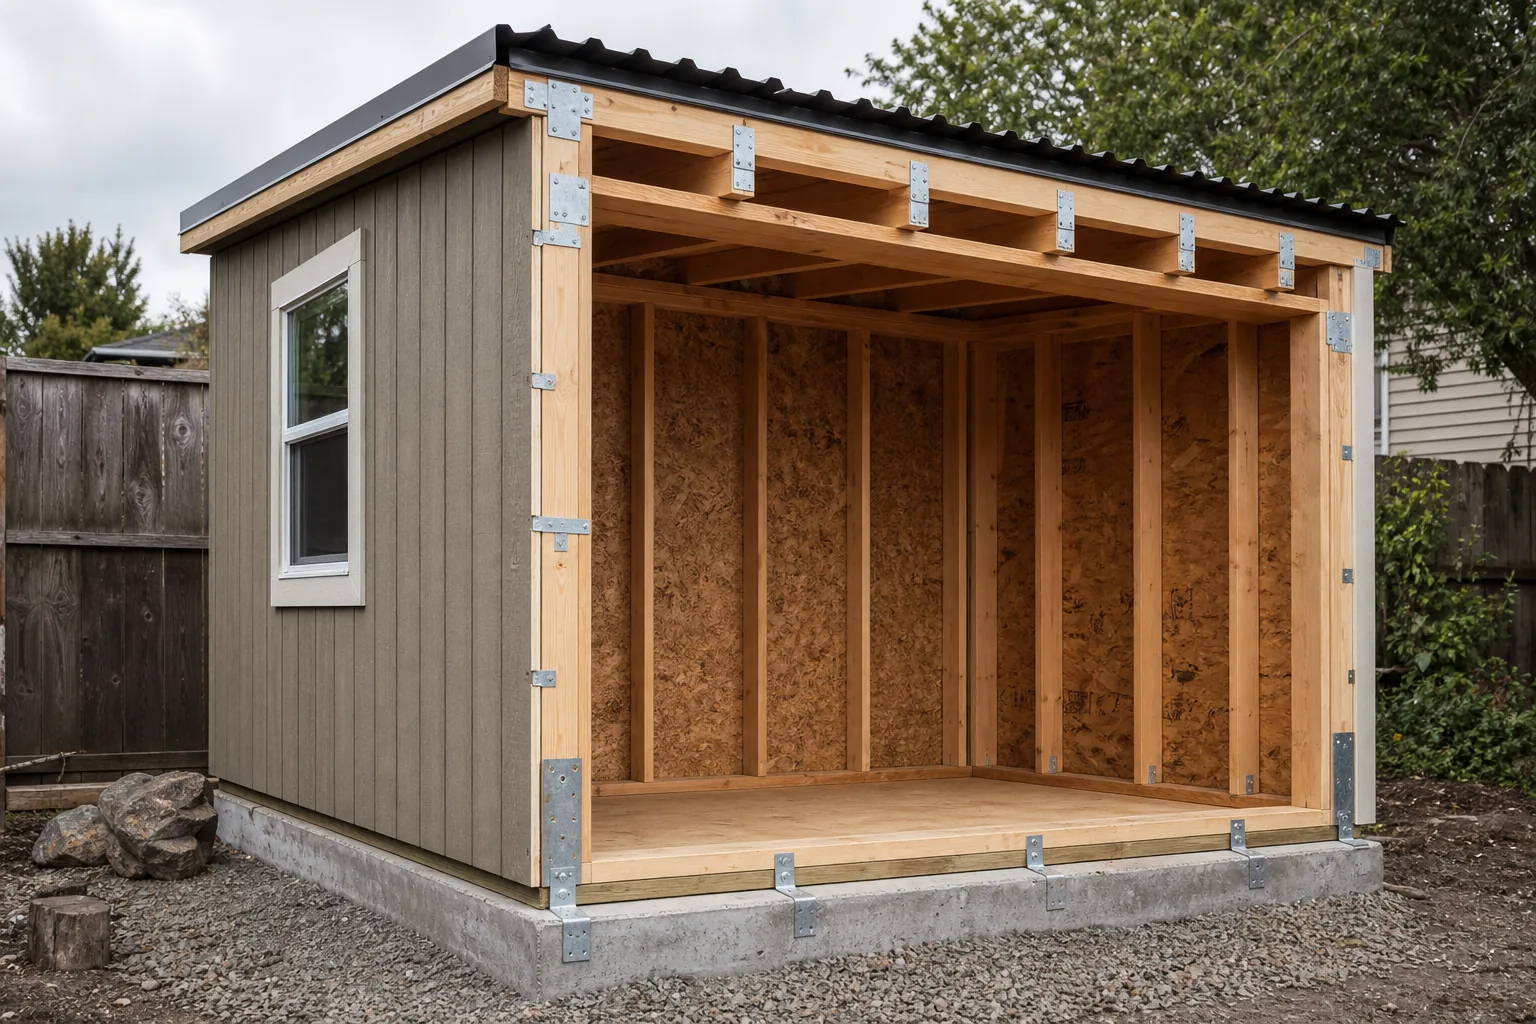
To understand how to anchor a shed, follow the load path from the roof and walls to the base, then from the base into concrete, piers, or suitable soil. Ground anchors beside an unconnected shed do very little. Each tie, bolt, bracket, skid, and footing must transfer uplift, sliding, and overturning forces through a connection designed for the local wind conditions and the exact shed.
This is a research based structural overview, not a site-specific anchor schedule. Yard Foundry has not pull tested anchors or inspected the shed systems described here. Use the current shed manual, local building requirements, soil conditions, and professional engineering where required.
Anchoring is a chain, not one piece of hardware
Wind pushes on walls, creates suction over the roof, and tries to slide or overturn a light building. The anchor at ground level only helps if the rest of the shed can deliver those forces to it. A strong bolt through a weak plastic edge, an earth anchor tied to loose trim, or a slab connection beneath walls that are not fastened to the floor leaves a broken chain.
The U.S. Department of Energy’s Building America guide to continuous load paths explains the general principle: positive connections carry vertical and horizontal forces from the roof through walls and floors to the foundation. That guide is written for residential construction, not small shed kits, but the force path is the same idea a shed anchoring plan must resolve.
| Connection in the chain | What it must do | What to verify |
|---|---|---|
| Roof covering to roof frame | Keep panels or sheathing attached under suction | Fastener type, spacing, washers, edge zones, and substrate |
| Roof frame to walls | Transfer uplift and lateral force into wall framing | Approved screws, clips, straps, or molded connections |
| Walls to floor or base rail | Keep the shell attached to the floor system | Fastener locations and reinforcement at the connection point |
| Floor frame or base rail to foundation | Transfer sliding and uplift into concrete, piers, skids, or anchors | Connector capacity, spacing, embedment, edge distance, and corrosion protection |
| Foundation to soil | Resist pullout, bearing failure, sliding, and overturning | Soil, frost, drainage, depth, and site-specific design requirements |
Do not add random fasteners to a kit panel. Drilling an unapproved hole can crack resin, start corrosion in thin metal, or miss the reinforcing frame. Find the anchor points in the manufacturer’s installation manual and use the stated hardware or an approved engineered alternative.
Identify the design conditions first
An anchor count copied from another shed is not a design. Wind speed, exposure, roof shape, door openings, building dimensions, soil, foundation, and connection spacing all affect demand. Coastal and open-terrain sites can require far more than a sheltered inland yard.
Ask the local building department what code, wind criteria, frost rules, and permit thresholds apply to the address. A small structure may be permit-exempt and still need anchoring. Johnston County, North Carolina, for example, publishes a local rule for certain small accessory buildings that requires anchoring against overturning and sliding. Its specific formula and thresholds belong to that jurisdiction, not to every backyard in the country.
Get the shed’s engineering or installation documents. They should state the approved foundation types, anchoring locations, and any wind limit or design condition. If the seller offers an anchor kit, confirm which shed sizes, soils, and wind conditions it covers. A bag labeled “universal” does not settle those questions.
How to anchor a shed on different foundations
Concrete slab or perimeter foundation
New concrete allows cast-in anchor bolts or approved straps to be placed before the pour. Existing concrete may accept post-installed anchors, but anchor type, diameter, embedment, hole cleaning, edge distance, slab thickness, concrete condition, and spacing all matter. A fastener close to a slab edge can split the concrete rather than hold it.
The wall or base rail needs a compatible connection to each anchor. On a wood-framed shed, that may be a treated sill plate and code-approved anchor bolts or straps. A resin or metal kit may use its own base rail and bracket pattern. Do not put a generic bolt through a hollow molded channel unless the manual provides a load-spreading part for it.
Municipal details illustrate why local documents matter. The City of Hastings, Minnesota, publishes minimum anchor-bolt dimensions, embedment, spacing, and end locations for certain accessory structures. Those values are useful only inside the conditions of that adopted detail. Your slab and wind design may call for something else.
Wood platform on blocks, piers, or footings
A platform adds another set of connections. The shed shell attaches to the floor frame. Joists and rim boards attach to beams or skids. Beams attach to posts, piers, or ground anchors. Each step needs a positive connector. The weight of plywood and stored tools is not a substitute.
Concrete deck blocks resting on grade may support gravity in some small-shed plans, but they do not automatically resist uplift or sliding. If the approved plan uses piers, install the required post bases, straps, bolts, and bracing. Frost movement and rot can loosen a platform even when the anchor itself remains buried.
Review the base construction in our resin shed foundation guide. Use the Shed Foundation Material Calculator only after the platform dimensions and aggregate depth come from a settled plan.
Skids and earth anchors
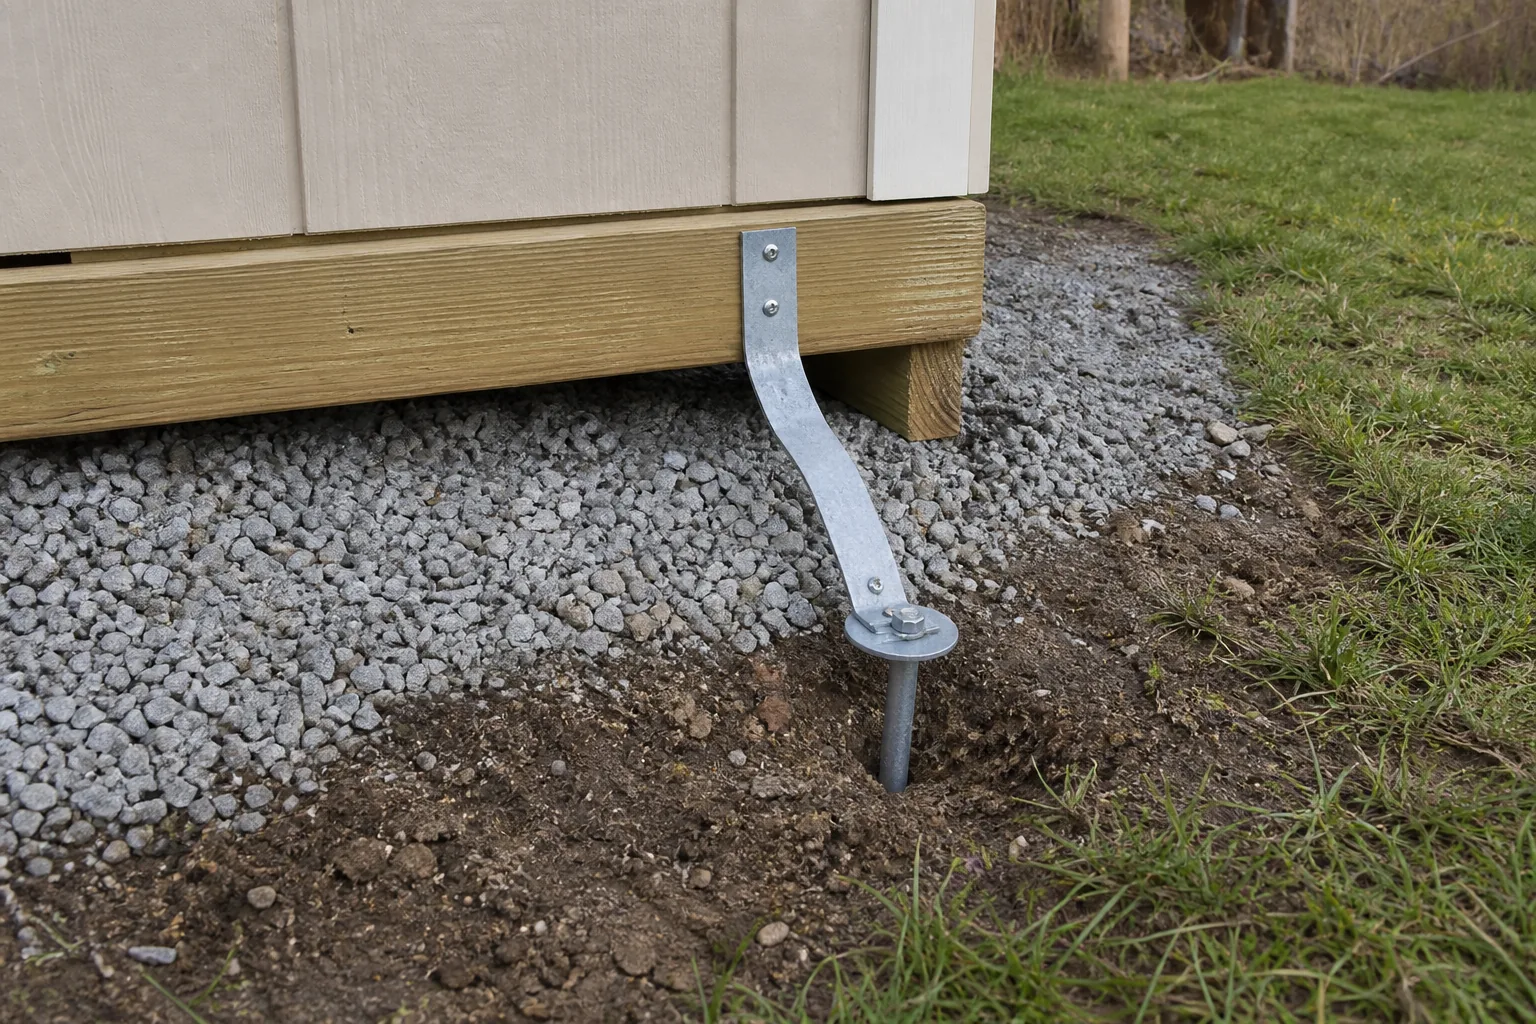
A skid-mounted shed can be tied to earth anchors when the shed manufacturer and local authority approve the arrangement. The strap or cable must connect to a structural skid or frame member, not siding. The anchor must suit the soil, installation angle, depth, corrosion exposure, and required capacity.
Loose fill, saturated ground, disturbed soil, roots, and shallow rock can reduce pullout resistance. If capacity matters, use an anchor with documented ratings and follow its installation and verification method. High-wind or uncertain-soil sites may need an engineered helical anchor, concrete footing, or another foundation.
Before driving or twisting anything into the ground, contact 811 as advised by the Pipeline and Hazardous Materials Safety Administration and follow the state process. Utility marks may not identify every private line on a property, so ask about irrigation, lighting, private electric feeds, and abandoned services too.
Pavers and gravel pads
Pavers and compacted gravel can provide drainage and a level bearing surface. They are not anchors. A shed on a gravel pad still needs an approved tie to earth anchors, piers, a perimeter foundation, or another system that resists the design forces.
Do not loop a cable around a loose paver or screw a bracket only into aggregate. If the foundation plan combines a gravel pad with anchors outside the base, protect the ties from mower impact, abrasion, and standing water. Keep them inspectable rather than burying an improvised connection.
Material changes where the tie can connect
Wood-framed sheds usually provide identifiable studs, plates, rim boards, joists, and skids. That makes the load path easier to see, although connection capacity still depends on fastener schedule, wood condition, and connector geometry.
Metal sheds often rely on thin formed channels and a base rail. The manufacturer’s bracket and screw pattern spreads load across the frame. Extra holes can tear or corrode. Resin sheds may use molded panels around a metal or reinforced base system. A screw that feels tight in plastic is not proof of wind capacity.
Our resin vs. metal shed guide compares the wider ownership tradeoffs. For a resin model, the resin garden shed buying guide also lists the structural documents and base details worth checking before purchase.
Retrofitting an existing shed
Start with an inspection, not a shopping list. An anchor cannot rescue rotten skids, a cracked slab edge, loose roof panels, or a racked wall. Correct drainage and structural damage first.
- Identify the shed brand, model, dimensions, and original installation instructions.
- Photograph roof-to-wall, wall-to-floor, floor-to-base, and base-to-ground connections.
- Check the frame for corrosion, rot, cracking, distortion, and missing fasteners.
- Confirm the foundation type, thickness or depth where known, and its current condition.
- Ask the manufacturer whether a current retrofit kit applies to that model.
- Take the documents and site conditions to the building official or engineer when required.
- Install the approved system, then record connector type and location for future inspection.
A shed that is already out of square may need to be unloaded, braced, lifted, or rebuilt before anchoring. Do not pull a bowed wall straight with a ground anchor and leave the tie under unknown tension. Structural repair should restore the intended geometry first.
Moisture damage tends to start low, near the same members that anchors rely on. If the base is wet or metal surfaces sweat, use the sequence in the shed condensation guide while the floor and lower frame remain accessible.
Common anchoring mistakes
- Tying to siding, a decorative corner cap, or an unreinforced plastic panel
- Treating pavers, stored weight, or a gravel pad as an uplift connection
- Installing earth anchors without checking utilities, soil, capacity, or corrosion exposure
- Using post-installed concrete anchors too close to a thin or damaged slab edge
- Anchoring the floor but leaving roof-to-wall connections loose
- Mixing hardware that creates corrosion between dissimilar metals
- Blocking doors or vents with straps and retrofit brackets
- Assuming a permit exemption removes wind-resistance requirements
Compare shed anchor-kit listings on Amazon (paid link). Treat a kit as a candidate only after its documented capacity, connector method, soil assumptions, and compatible shed models match the approved plan.
Inspect the load path every year
Check after winter, after a severe wind event, and whenever the shed shifts or doors stop latching. Look for loose nuts, elongated holes, cracked resin, torn metal, rust, frayed straps, rotten wood, washed-out soil, exposed anchors, and new slab cracks. Keep the base clear enough to see the connections.
Fastener replacement must match the original material, coating, diameter, and length. A stainless fastener in the wrong metal assembly can still create a corrosion problem, while a thicker screw can split a narrow wood member. Use the manufacturer’s service parts or an approved specification.
Empty or lightly loaded sheds can be vulnerable because dead weight contributes less resistance, but filling a shed with concrete blocks is not a design repair. Stored weight can overload floors and it still may not connect the roof to the foundation.
Frequently asked questions
Does a heavy shed still need anchors?
Often, yes. Weight may help resist uplift and sliding, but the required design also depends on wind, geometry, openings, exposure, and local code. Anchors and structural connections provide a defined load path instead of relying on contents.
Can I anchor a shed to patio pavers?
Loose patio pavers are a bearing surface, not a reliable wind anchor. Use an approved connection to a designed concrete foundation, pier, earth-anchor system, or other foundation specified for the shed and site.
How many earth anchors does a shed need?
There is no safe universal count. Required number and spacing depend on the design load, shed dimensions, connection layout, soil, anchor rating, and local requirements. Follow the engineered or manufacturer-approved plan.
Before buying hardware, draw one line from a roof panel down to the soil and label every connector it crosses. Any unlabeled gap deserves an answer. That simple exercise keeps the project focused on a complete load path rather than the most visible anchor at ground level.