Disclosure: This page contains affiliate links. As an Amazon Associate, Yard Foundry earns from qualifying purchases.
A smart irrigation controller should match the conditions it can measure reliably. A weather based controller is usually the simpler choice for a multi-zone sprinkler system with dependable local weather data. A soil moisture controller makes more sense when actual root-zone moisture regularly differs from the weather estimate. That can happen in deep shade, heavy soil, or a landscape with unusual drainage. Neither type repairs poor sprinkler coverage, leaking valves, or badly grouped zones.
This is a research based buying guide. Yard Foundry has not physically tested the controllers discussed here, and product features should be checked against the current manual before purchase.
How a smart irrigation controller makes a watering decision
A clock timer opens each valve for the same programmed duration until someone changes it. Smart controls add a decision layer. They either estimate how much water the landscape has used or check whether the soil is dry enough to permit a scheduled cycle.
The U.S. Environmental Protection Agency describes weather based irrigation controllers as devices that use local weather data and landscape conditions to adjust watering amount, frequency, and timing. Soil moisture based controllers use a sensor in the ground to bypass irrigation when the measured area is already wet enough. Those are different control methods, even when both appear in the same phone app.
| Question | Weather based control | Soil moisture control |
|---|---|---|
| What does it measure? | Weather data plus programmed landscape details | Moisture at the installed sensor location |
| What does it change? | Usually run time, frequency, or both | Usually allows or blocks a scheduled cycle at a moisture threshold |
| Best fit | Several conventional lawn and landscape zones | A representative area where soil moisture is the strongest decision signal |
| Main weakness | Bad site inputs or unrepresentative weather data | Poor placement, calibration, or too few sensors for a variable site |
When weather based control is the better fit
Weather based models are useful when irrigation demand rises and falls with temperature, solar exposure, rain, and seasonal plant use. They can manage several zones without burying a moisture probe in each one. The controller still needs accurate setup data: plant type, soil, sun exposure, slope, sprinkler precipitation rate, and allowed watering days. A clever algorithm cannot rescue a zone labeled incorrectly.
This type tends to work well on a property with ordinary turf and planting beds, a stable internet or local sensor connection, and clear differences between summer and shoulder-season demand. EPA’s WaterSense program independently certifies labeled weather based controllers against irrigation adequacy and excess criteria. The label does not guarantee a perfect schedule for every yard, but it gives buyers a more useful screening standard than an app feature list alone.
Ask where the weather input comes from. Some products use a nearby weather signal, some use an on-site sensor, and others combine both. EPA’s WaterSense product search lets buyers filter labeled models by data source and station capacity. If a remote weather station sits at a different elevation or rainfall pattern, check whether the controller accepts a local rain sensor or manual adjustment.
When a soil moisture sensor is worth the installation
A soil sensor answers a narrower question: is the soil around this probe dry enough to water? That direct reading can be useful where local weather estimates miss what is happening below the mulch or turf. It may also help a site with slow-draining soil where a weather model keeps scheduling water before the root zone has dried.
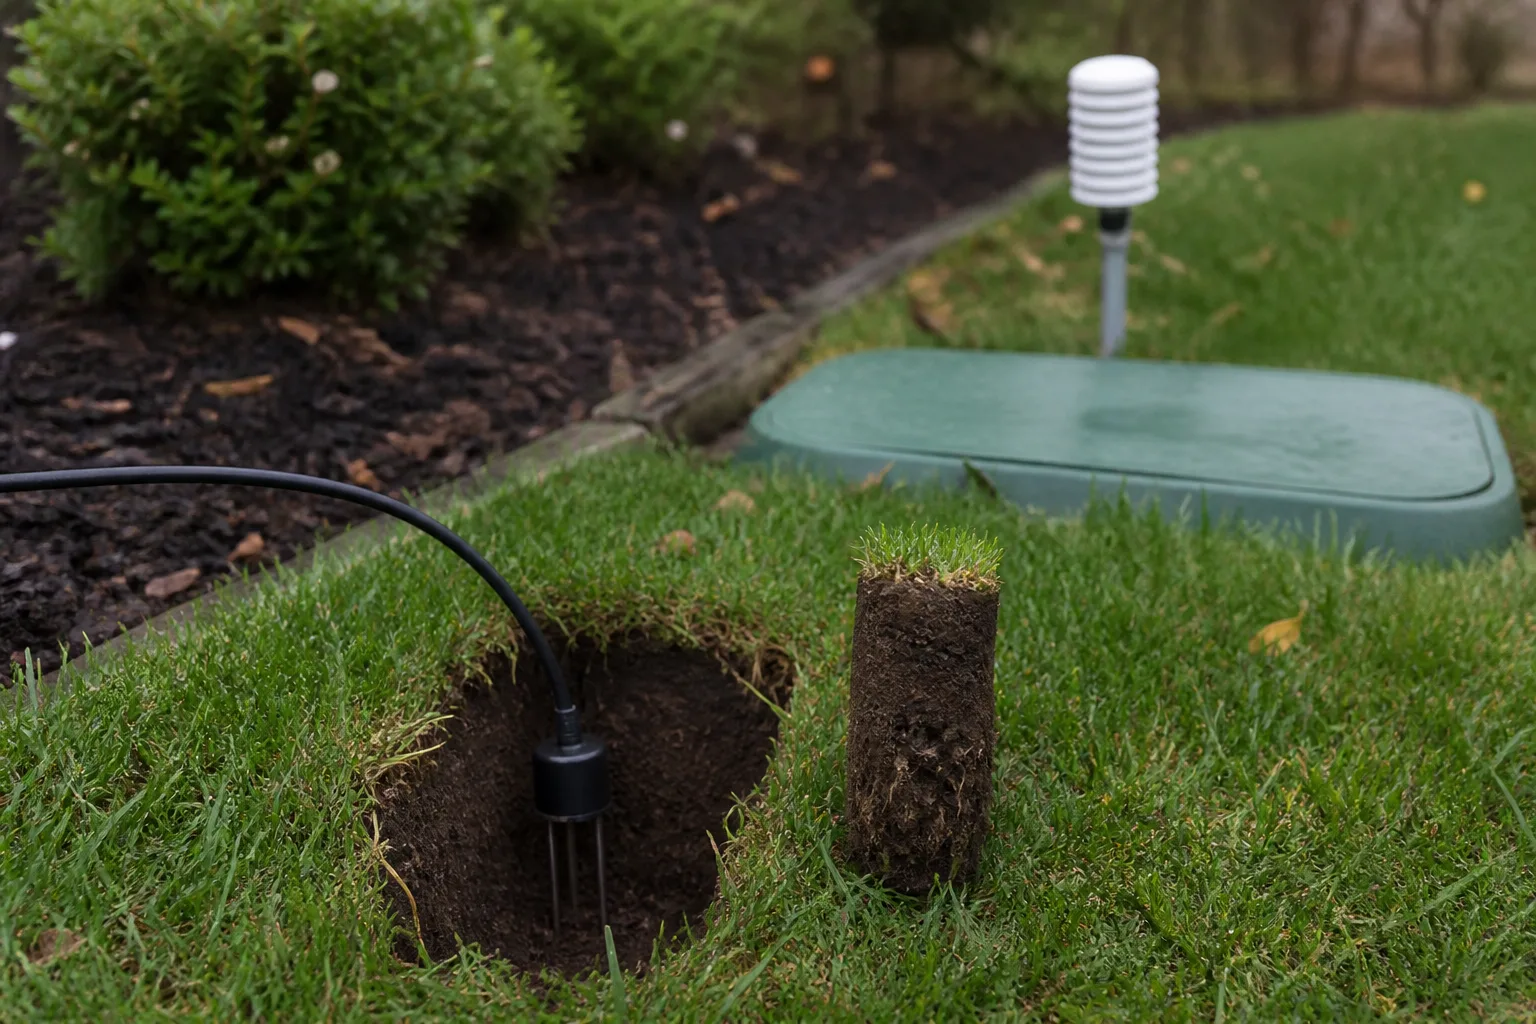
Placement decides whether the reading is useful. Oklahoma State University Extension advises placing a sensor in a representative turf area, away from sprinkler heads, tree roots, sidewalks, and walls. A probe under a downspout, beside hot pavement, or in a low wet pocket can control the whole zone from an outlier. Mixed soil and sun conditions may need more than one sensor, but only if the controller supports zone-specific inputs. Check that point before buying.
Calibration is part of ownership. The threshold must suit the soil and plants rather than whatever number appears by default. After installation, inspect moisture in several spots across the zone. If the probe says wet while the far edge is dry, the problem may be coverage or placement rather than the threshold.
Weather vs. soil moisture: a practical choice
- Choose weather based control for several landscape zones that broadly follow local weather and need automatic seasonal adjustment.
- Choose soil moisture control when the root-zone reading is more informative than a weather estimate and one or more probes can represent the irrigated area.
- Consider a compatible combination when weather scheduling can set demand and a soil sensor can prevent a needless cycle. Confirm that the exact controller and sensor are certified and supported together.
- Keep a conventional timer if the irrigation system itself still needs repairs. Spend first on pressure correction, nozzle matching, leaks, and zone design.
EPA requires a product that integrates both methods and carries a WaterSense label for the combined unit to meet the applicable specifications for both controller types. A box that merely accepts an optional probe may have a different certification status. Look up the exact model, not just the brand family.
Check the irrigation hardware before the app
Count active valve zones and leave room for a realistic expansion. Then confirm valve voltage, common-wire arrangement, master valve or pump-relay support, enclosure rating, and power source in the installation manual. A controller with eight on-screen zones does not necessarily include eight physical terminals in the base unit.
Inspect the system while each zone runs. Note broken heads, misting, runoff, blocked spray, mixed nozzles, and areas that water pavement. A smart schedule changes when valves open. It does not change how evenly a zone applies water. Calculate the landscape’s baseline need with the Garden Water Demand Calculator, then use the result as a reasonableness check rather than a fixed prescription.
Drip zones deserve separate attention. The controller must support the long run times and cycle pattern the emitters need, while the valve, filter, and pressure regulator handle the hydraulics. For a zone-level estimate, add the emitter flow and compare the schedule with the Drip Irrigation Flow and Runtime Calculator.
Features that matter after installation
Local watering restrictions should be easy to enter without defeating the smart mode. Manual zone testing needs to work at the controller, not only through a phone. Offline behavior matters too. Find out whether the last schedule continues when Wi-Fi or a cloud service is unavailable, and whether a seasonal adjustment can be made from the panel.
Flow monitoring is useful but separate from weather or soil control. A compatible flow meter can flag unexpected use, yet it may not identify the failed fitting or broken head. Treat alerts as an invitation to inspect the property. Also check notification history, shared access for an irrigation contractor, controller backup behavior, and any subscription needed for weather data or advanced reports.
Rebates can change the value calculation. EPA maintains a WaterSense rebate finder, and many local utilities limit incentives to listed models installed under specific rules. Verify the local program before ordering rather than assuming any product labeled “smart” qualifies.
Commission the controller instead of trusting defaults
- Repair leaks and obvious coverage problems before changing the timer.
- Enter accurate soil, plant, sun, slope, and nozzle information for every zone.
- Set watering-day restrictions and a sensible maximum run time.
- Run each zone manually and watch where water lands.
- Check root-zone moisture after several cycles, including the driest and wettest areas.
- Review skipped and completed cycles for two to four weeks, then adjust one variable at a time.
A sloped clay lawn may need cycle-and-soak scheduling to reduce runoff, while a sandy bed may need shorter, more frequent applications. The controller’s soil label is only a starting point. Observe the wetting depth and whether water stays inside the landscape.
Buying checklist
- WaterSense listing for the exact model or controller and sensor combination
- Enough stations, plus the expansion module cost if one is required
- Compatibility with existing valves, master valve, pump relay, rain sensor, and flow meter
- Outdoor enclosure or suitable indoor mounting location
- Usable manual controls and documented offline behavior
- Support for local watering restrictions and cycle-and-soak
- Clear sensor placement and calibration instructions
- No required subscription that appears only after setup
Compare WaterSense smart irrigation controller listings on Amazon (paid link). Verify the exact model in EPA’s directory before buying.
The safest default for a typical multi-zone home system is a WaterSense labeled weather based controller with good local data and straightforward manual controls. Choose soil sensing when you can place and calibrate the probe well enough for its reading to represent the zone. For more planning tools, visit the Yard Foundry tools and calculators hub.