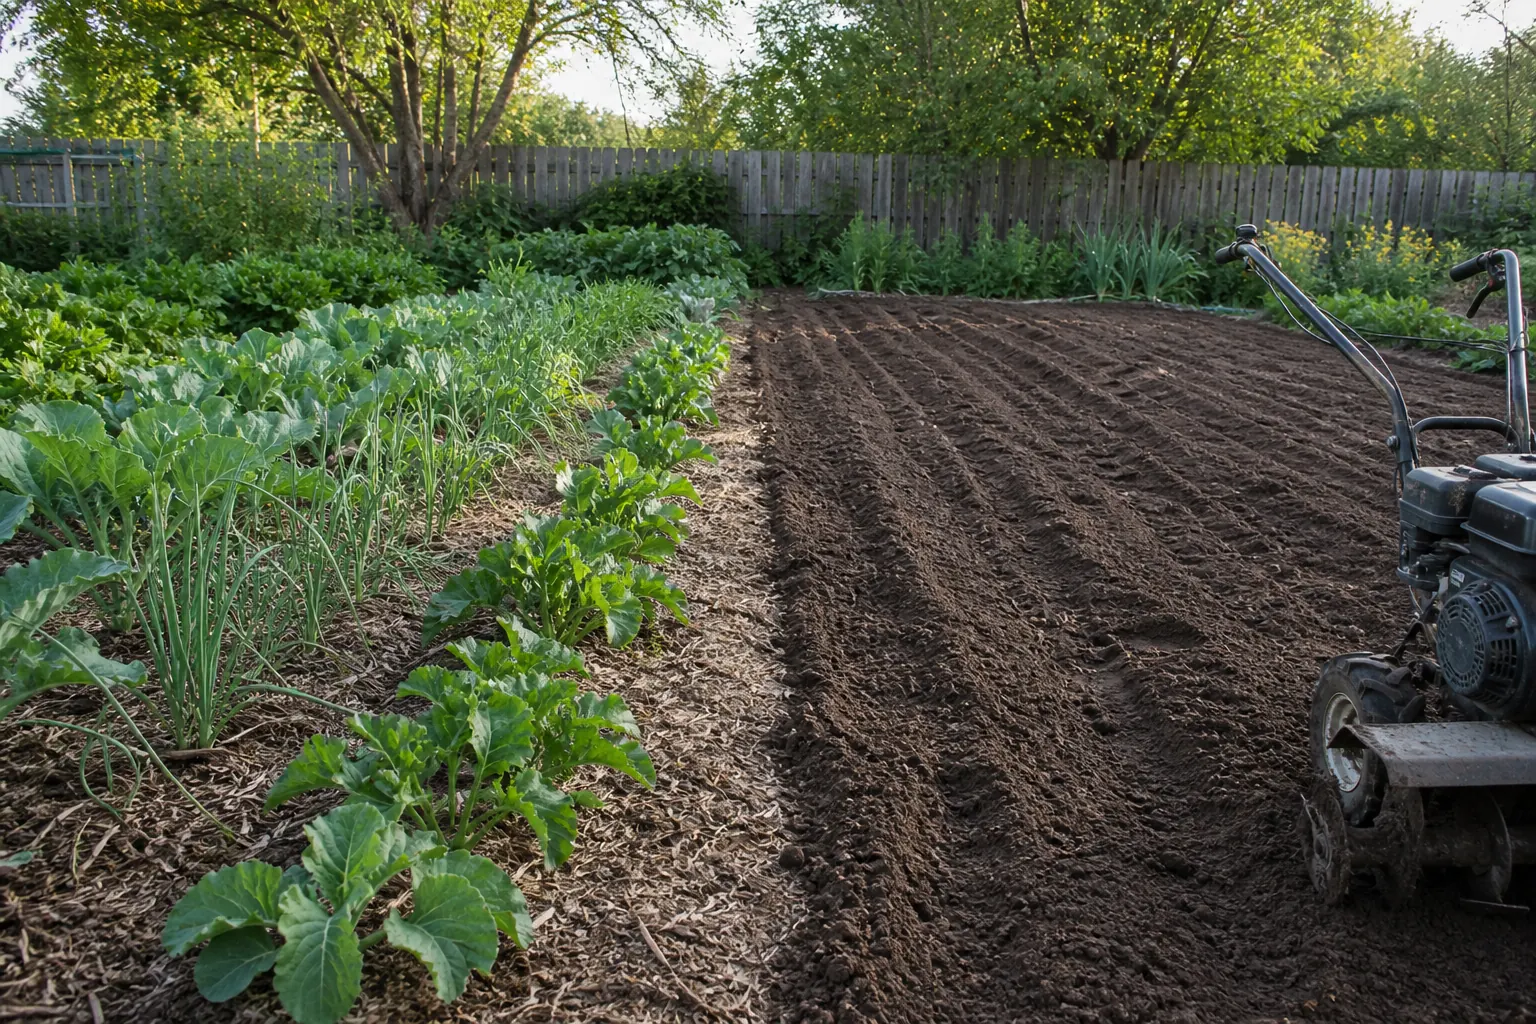
A no till vs till garden decision does not need to become a loyalty test. No-till is the better long-term default for an established bed with workable soil: keep it covered, leave roots where practical, add compost at the surface, and disturb only the planting area. Tilling still has a narrow job when you are opening severely compacted ground, incorporating a one-time correction, or preparing a large new site. The mistake is turning that first repair into a twice-yearly habit.
Before choosing a method, name the problem. “The soil is hard” can mean dry clay, a compacted layer, living sod, surface crust, or simply soil that has not been loosened for hand planting. Those conditions need different tools. A rotary tiller can make the surface look finished while leaving the cause untouched below its working depth.
No till vs till garden: the short comparison
| Question | No-till or reduced disturbance | Tilling |
|---|---|---|
| Established garden with good structure | Usually the better default | Little benefit and repeated disturbance |
| New bed in dense sod | Possible with tarping, sheet methods, or sod removal | Fast, but may spread perennial roots and weed pieces |
| Severely compacted new site | Broadforking or targeted loosening may work | One shallow, staged intervention may be practical |
| Mixing a tested amendment | Surface apply if the material and crop allow | Useful for a specific incorporation depth |
| Wet soil | Stay off it | Do not till |
| Long-term soil cover | Mulch, residue, and living roots stay in place | Usually leaves the surface bare unless cover is restored |
The Natural Resources Conservation Service puts minimum disturbance alongside soil cover, plant diversity, and living roots in its soil-health principles. Its guidance says tillage breaks soil aggregates and biological habitat, accelerates organic matter loss, and increases erosion risk. That does not mean a garden fork can never enter a bed. It means disturbance should have a defined purpose and the smallest workable footprint.
What tilling does well
A tiller can remove the physical barrier between a gardener and a large new plot. It cuts vegetation, loosens the upper layer, and mixes material quickly. On a site where a fork barely penetrates and every planting hole becomes a separate excavation, one careful pass may save enough labor to make the garden possible.
University of Minnesota Extension lists useful tillage jobs that include opening new gardens, managing some vegetation, preparing a seedbed, and incorporating amendments. It also notes that an extremely compacted new garden may be a reasonable case for tilling once. “Once” matters here. Repeating the operation after the soil becomes workable adds disturbance without recreating the original benefit.
Tilling can also help incorporate lime or another amendment when a soil test calls for a measured amount at a stated depth. Do not add compost, fertilizer, lime, sand, or gypsum as a guess. A soil test and the amendment’s instructions should set the rate. Mixing the wrong material efficiently is still the wrong repair.
If machine work is justified, choose the tool class carefully. The tiller versus cultivator guide separates primary ground breaking from shallow between-row work. For larger hard sites, the rear-tine tiller buying guide covers traction, tine rotation, transport, and storage.
What repeated tilling costs
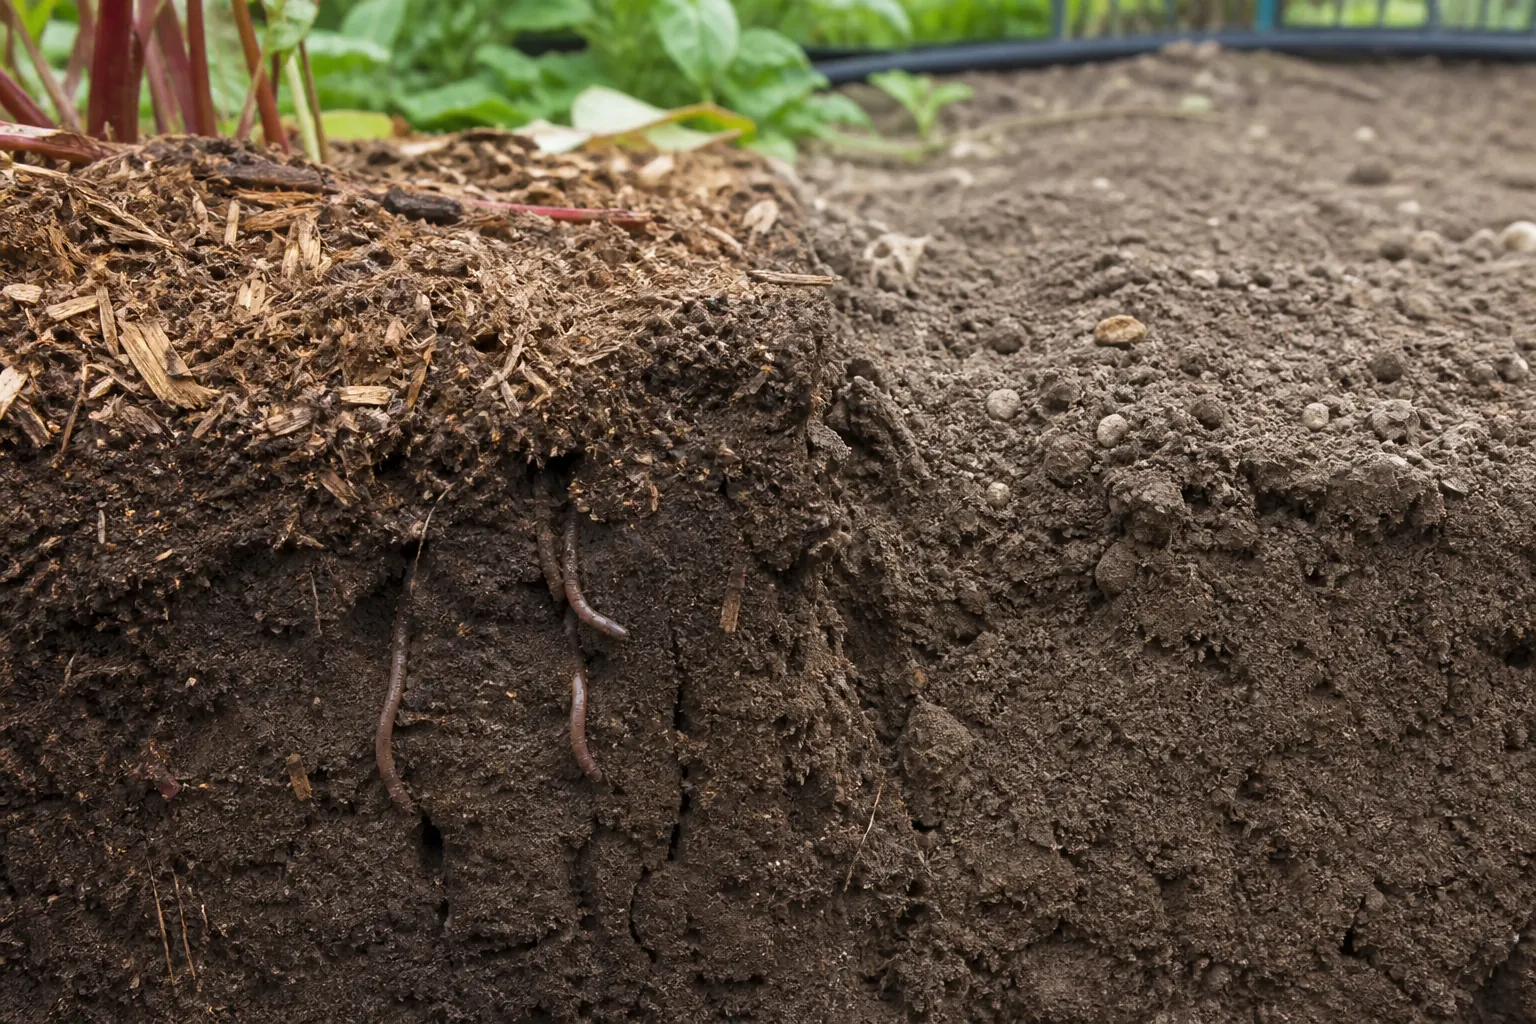
Healthy soil is not a pile of uniformly fine particles. It contains aggregates with pore spaces for water and air. University of Minnesota Extension explains that tillage breaks those aggregates into smaller pieces, making the soil more prone to compaction and erosion over time. A freshly tilled bed feels loose because it contains more temporary air. Rain, irrigation, and footsteps can settle that loose layer back down.
Repeated work at the same depth can also create a dense layer immediately below the tines. Roots may spread sideways when they meet it. Water may enter the loose surface and then slow at the compacted boundary. Going deeper every year is not a durable answer because the machine keeps moving the problem and exposes more soil.
Bare soil is another cost. Once tilling removes surface residue, rain can strike the soil directly and wind can move the finest particles. Restore cover promptly if you till. Mulch, a quick crop, or a planned cover crop protects the repaired surface while roots and soil organisms rebuild structure.
What no-till looks like in a home garden
No-till does not mean abandoning the bed. It changes where the work happens. Compost stays on the surface unless a specific correction requires incorporation. Mulch protects open soil. Crop roots remain in place after harvest when disease management allows. Seeds go into narrow furrows, and transplants go into individual holes rather than a fully inverted bed.
NRCS describes the garden version plainly: clear small rows or spots and dig only the holes needed for seeds or transplants. That still disturbs soil, but far less than pulverizing the full area. Home gardeners often use “no-till” for several levels of reduced disturbance. The label is less important than the trend from broad, frequent work toward targeted, occasional work.
Weeds need a different plan when a tiller is no longer the reset button. Pull young weeds before seed set, cut larger annuals at the surface, maintain mulch, and use an opaque tarp for a planned period when converting a larger patch. Perennial weeds with rhizomes may need careful digging. Chopping and spreading them with rotary tines can multiply the cleanup.
Compaction also needs diagnosis. A broadfork or garden fork can lift and crack a dense layer without flipping the whole profile. Minnesota Extension specifically presents broadforking as an option for loosening soil while preserving more aggregates. It is demanding physical work and not suited to every site, but it gives a small garden a middle path.
A transition plan for an established tilled garden
- Mark permanent beds and paths. Keep feet and machine wheels out of the growing area.
- Run a soil test before changing fertility or pH.
- Resolve perennial weeds and any confirmed compaction while access is easy.
- Add a modest layer of finished compost where the test and crop plan support it.
- Cover exposed soil with mulch or a living crop.
- Plant through the cover with a trowel, dibber, narrow furrow, or transplanting tool.
- Evaluate infiltration, rooting, weeds, and crop performance over more than one season.
Do not expect the first spring to look like a mature no-till system. Residue can keep soil cooler, which may delay early planting in a cold, wet climate. Pull mulch back from a narrow seed row to let it warm and dry. Put the cover back once seedlings are established and the soil has warmed.
Raised beds make permanent paths simple. The raised garden bed guide explains frame and access choices, while the raised bed soil calculator helps estimate the initial fill. A bed should not need wholesale replacement or deep rotary mixing every season.
When a hybrid method is more honest
Some sites need targeted tillage, not a permanent till or no-till identity. A new vegetable plot may be tilled once, divided into permanent beds, and then managed with surface compost and mulch. A compacted strip may be loosened while the rest of the garden remains untouched. A fine-seeded row may receive shallow preparation while transplants go into minimally disturbed holes.
Reduced tillage is especially sensible when the alternative requires heroic labor that will not be repeated. The goal is a system the gardener can maintain. If an annual shallow pass is currently necessary, reduce its depth or area first. A smaller improvement that lasts is more useful than a purist plan abandoned by midsummer.
Garden scale matters too. A 100 square foot bed can be loosened with hand tools. A new 2,000 square foot plot may turn that approach into days of heavy work. Estimate rental and storage costs with the rear-tine tiller rent versus buy calculator before purchasing a machine for a single conversion.
Do not till these conditions
- Soil that molds into a tight wet ball or sticks heavily to the tool
- A bed with buried utilities that have not been located
- Steep ground outside the machine manual’s operating limits
- Soil full of large roots, wire, irrigation lines, or hidden debris
- An established perennial planting where tines will destroy roots
- A healthy bed when the only reason is that the surface looks untidy
Wet soil is the firmest stop. Machine weight and tine action can smear and compact it. Wait until a sample from the intended working depth breaks into crumbs with light pressure. Checking only the dry top inch can hide wet clay below.
Judge progress below the mulch
A no-till bed can look quiet while changing slowly. Check the same few indicators each season. Time how long a measured amount of water takes to soak in. Push a fork or narrow probe into the bed at consistent moisture. Dig one small hole and look for roots crossing old layer boundaries. Note whether weeds pull cleanly or snap at the crown.
Keep the comparison modest. One bed may receive more shade, different crops, or a heavier watering pattern, so yield alone cannot prove that the soil method caused the difference. A short log of labor, irrigation, surface crusting, and root condition gives a homeowner better evidence than a photograph of freshly tilled soil.
Choose by the next three seasons
Till when a defined, one-time job justifies broad disturbance and the soil moisture is right. Skip it when the bed already drains, roots can penetrate, and surface management can handle weeds and amendments. If the answer is unclear, disturb one small section and leave a comparable area under reduced tillage. Record water infiltration, weed pressure, time spent, and root condition rather than judging the beds by how fluffy they look on day one.
Most established home gardens benefit from moving toward permanent beds, permanent paths, soil cover, and narrower interventions. Tilling remains a tool. It should have a finish line.