Disclosure: This page contains affiliate links. As an Amazon Associate, Yard Foundry earns from qualifying purchases.
An automatic greenhouse vent opener can lift a roof vent as the greenhouse warms and close it again as the air cools, without wiring or a battery. Choose one by matching its brackets, lift rating, opening travel, and temperature range to the actual vent. Installation is usually straightforward, but the arm geometry and closing adjustment matter more than the number of screws in the package.
This guide covers passive wax cylinder openers for hobby greenhouse roof vents. It is research based and does not claim a hands on product test. Manufacturer instructions take priority because bracket layouts, winter procedures, and adjustment methods differ.
How a wax cylinder vent opener works
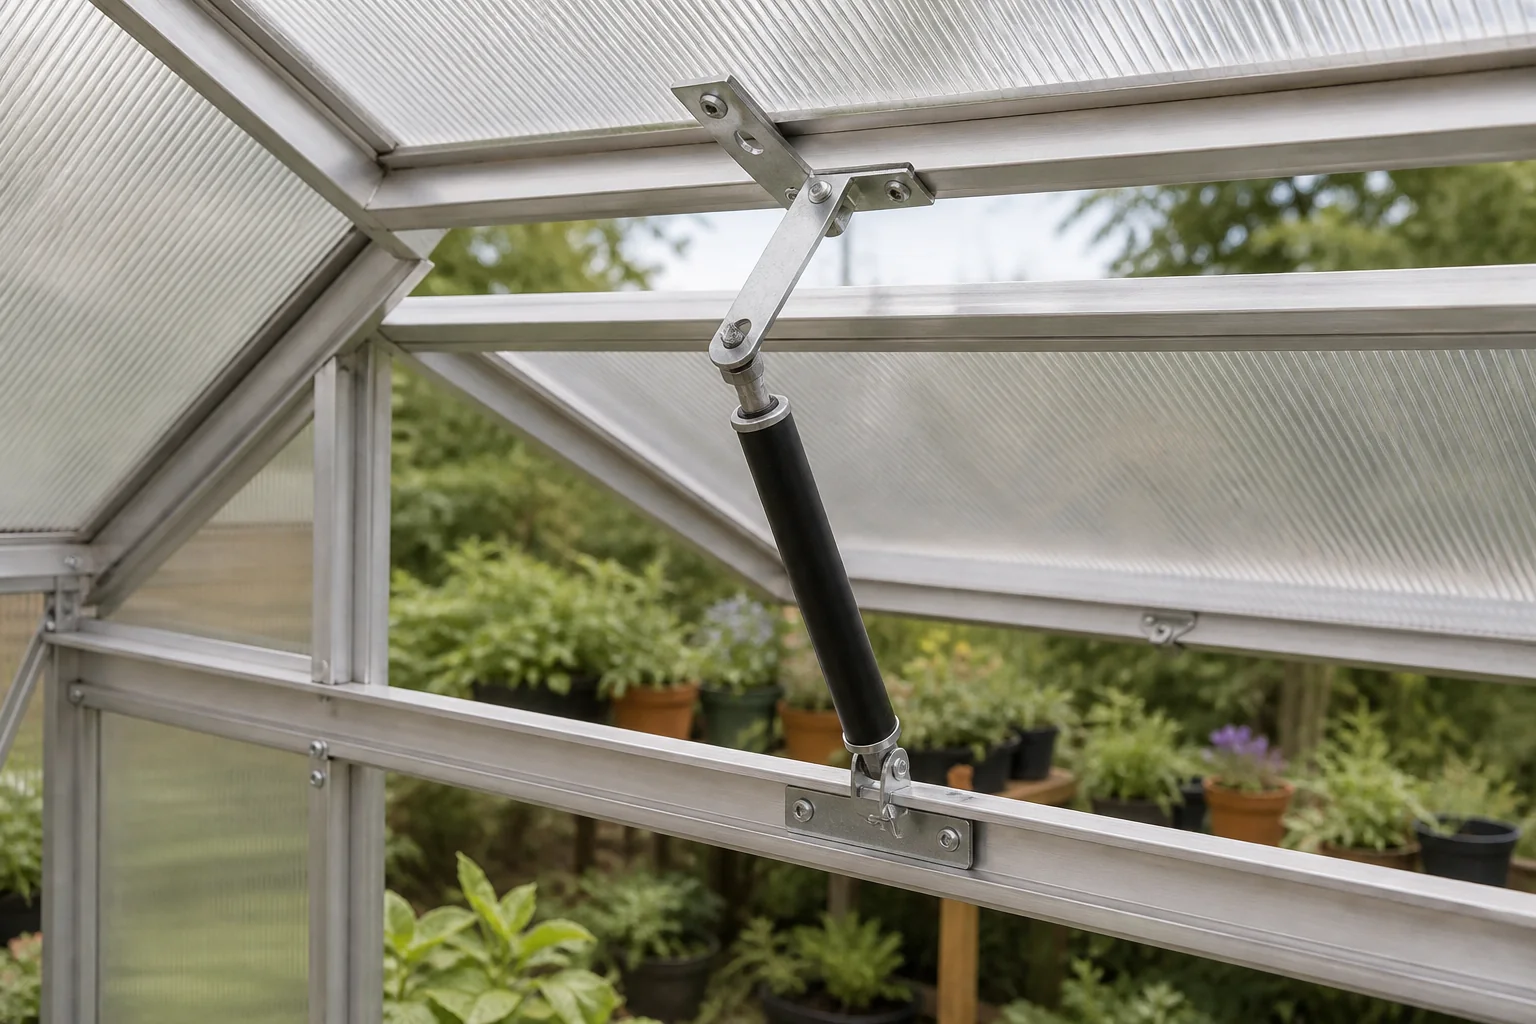
The power tube contains a material that expands as it warms. That expansion pushes a piston rod, moves the linked arms, and raises the vent. Cooling reverses the process, and a spring or the mechanism’s geometry closes the sash. Illinois Extension gives a concise explanation of the wax cylinder principle.
The opener responds to temperature at the cylinder, not a digital setpoint at plant height. Sun on the mechanism, a cold draft, roof position, and thermal lag can all change when it begins to move. The adjustment collar usually shifts the starting point or the closing gap, but it does not turn a passive opener into a precise thermostat.
That limitation is acceptable in many small greenhouses. The opener handles routine warmup when nobody is present. It should still be part of a larger ventilation plan with enough intake area, a clear outlet, and a backup for hot, still weather.
Automatic greenhouse vent opener buying checklist
| Specification | Why it matters | What to verify |
|---|---|---|
| Mounting compatibility | Brackets must fit the greenhouse profile and vent rail without damaging glazing | Frame model, bracket hole pattern, clamp type, and allowed fasteners |
| Maximum lift | An undersized unit may open slowly, stop short, or fail early | Complete vent weight, not just panel weight |
| Maximum vent area | A large sash creates leverage and wind load even when it is light | Manufacturer’s stated vent size limit |
| Opening travel | Short travel can leave too little free opening for airflow | Maximum stroke and expected vent angle on your hinge geometry |
| Opening temperature | The crop and ventilation plan determine when passive opening should begin | Factory range and available adjustment, using the exact manual |
| Winter and wind procedure | Snow, latches, and forced movement can damage the mechanism or sash | How to disconnect, lock, store, and lubricate the unit |
Match the opener to the vent, not the greenhouse floor area
A product may be advertised for a greenhouse size, but the opener only feels the vent attached to its arms. Measure the sash width and height, then find its total weight. Include the frame, glazing, handle, seals, and any hardware that moves with it.
The University of Alaska Fairbanks notes that heat activated wax mechanisms are generally used with small vents weighing less than roughly 10 to 15 pounds. Its greenhouse environment guide also explains why vents must work with the rest of the intake and exhaust system. Treat the weight range as broad context, not permission to ignore the opener’s own rating.
Check the vent hinge as well. It should swing smoothly under hand pressure without binding, scraping a panel, or twisting the frame. A sticky hinge can overload a correctly rated opener. A sash that falls to one side may need its hinge or frame corrected before automation is added.
Read product ratings as a complete set
Lift force, stroke, vent area, and temperature belong together. A long light vent can create awkward leverage. A small heavy glass vent may remain within the stated area limit but exceed the weight rating. A strong opener with short travel may lift the sash but leave too little airflow.
One current Canopia installation manual provides a useful example of model specific ratings: its XL unit lists a start opening range of 53.6 to 59 degrees F, maximum travel of 12 inches, maximum lift of 14 pounds, and a vent size limit of 2 square feet. Those numbers apply to that named unit and compatible Canopia vents. They are not universal specifications. Check the table in the manufacturer’s assembly instructions for the exact model being considered.
Compatibility questions to answer before ordering
- Does the greenhouse maker approve an automatic opener for this roof vent?
- Are the supplied brackets made for aluminum channels, wood framing, or a specific greenhouse profile?
- Can the brackets attach without drilling through polycarbonate?
- Will the arms clear the ridge, glazing clips, shelves, lights, and hanging baskets?
- Can the manual stay or latch be removed or disengaged as instructed?
- Is a replacement power tube available for the same opener?
- What does the manual require before high winds, freezing weather, or snow?
Brand matched hardware is often worth a modest premium on a kit greenhouse. Generic units can work well on wood framed vents or adaptable channels, but only when the bracket geometry and ratings truly match. A long list of included screws does not prove compatibility.
How many automatic openers are needed?
Use one opener for each independent vent unless the greenhouse manufacturer specifies a linked arrangement. Do not assume that automating one roof vent provides enough total ventilation. The opener controls motion; it does not create vent area.
Hot air needs a high outlet and replacement air needs a lower inlet. Doors and low side vents can help, provided they are open when the roof vent operates. For a fan based system, use the Greenhouse Fan CFM Calculator to estimate required exhaust capacity. Passive openers may serve as an early stage while a thermostat starts a fan at a higher temperature.
A small opener is also not a cure for a greenhouse with too few vents. Before adding accessories, review roof vent count, intake path, and summer climate alongside the frame and panel choices in the polycarbonate greenhouse kit guide.
How to install an automatic greenhouse vent opener
Work on a cool day when the power tube is retracted and the vent can stay closed. Wear gloves around aluminum edges. Keep your weight off greenhouse roof panels, and use safe access equipment for a high vent.
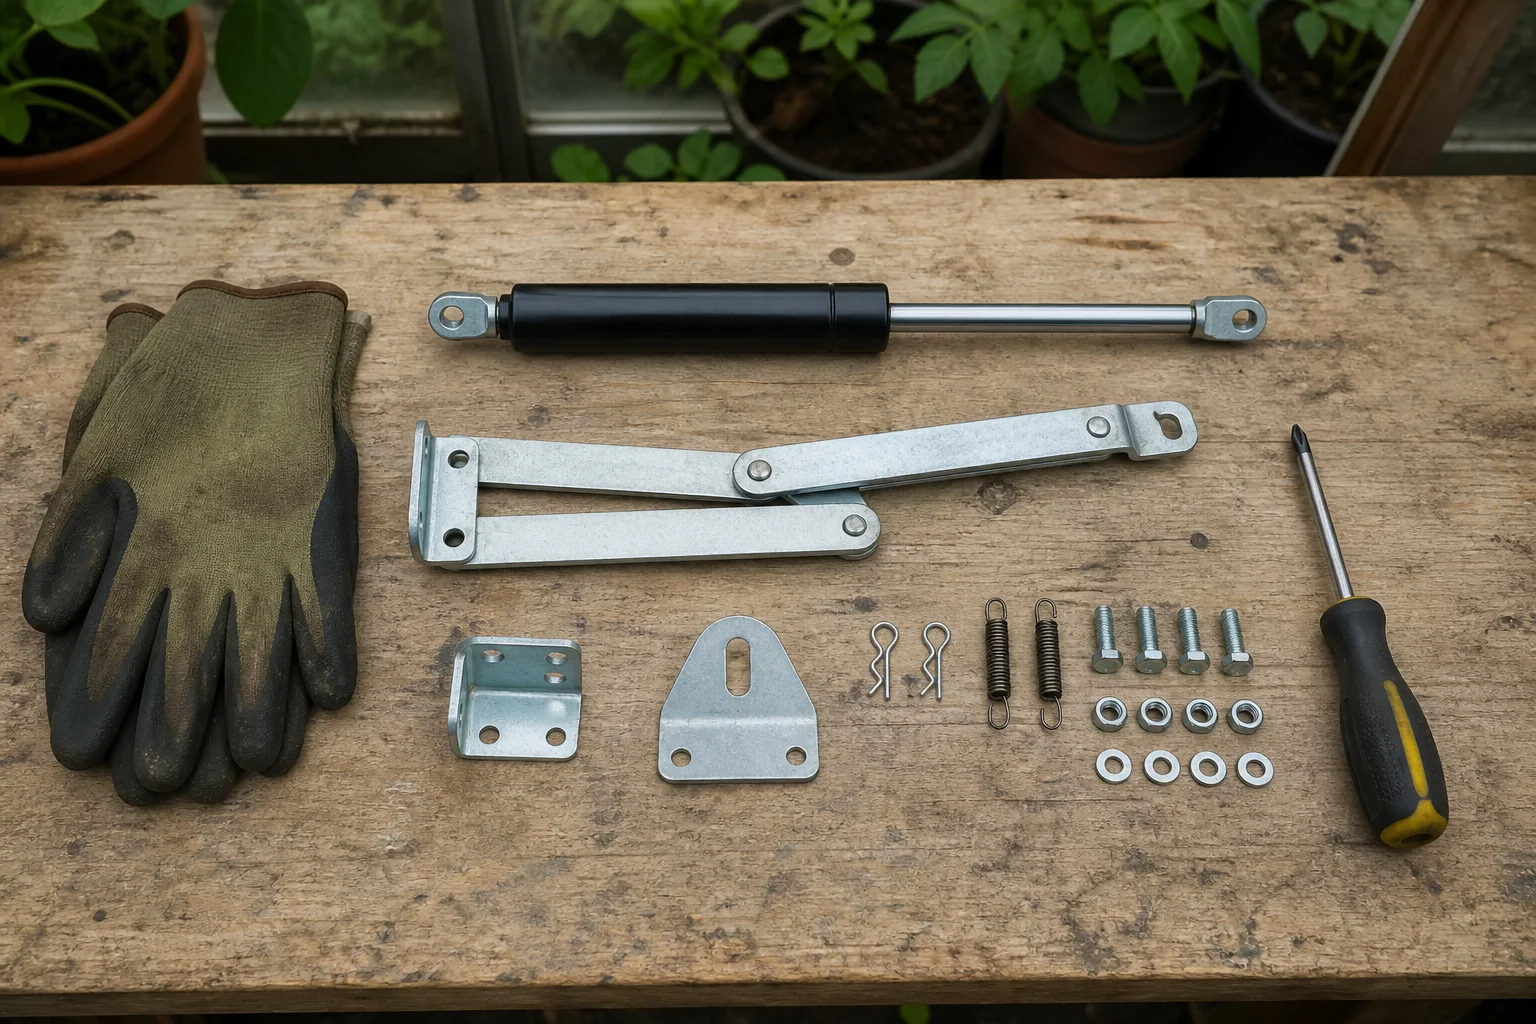
- Read the exact manual. Lay out the brackets, pins, springs, adjuster, and power tube. Identify any parts used only with certain greenhouse models.
- Test the bare vent. Open and close it by hand. Correct binding, loose hinges, misalignment, or damaged seals first.
- Remove the manual restraint. Take off or disengage the existing stay, latch, or chain only as directed. A latch left engaged can make the power tube push against a locked sash.
- Prepare the cylinder. Follow the manual. Some makers instruct the installer to cool the power tube before fitting. Canopia, for example, calls for about 30 minutes in a refrigerator for the cited unit.
- Fit the frame bracket loosely. Use the approved channel bolts, clamps, or screws. Do not improvise holes through glazing.
- Fit the vent bracket. Center it as the drawing shows so the arms do not twist sideways during travel.
- Connect the arms and piston. Install retaining pins fully. Confirm that the linkage can fold without rubbing the frame.
- Adjust the closing position. Use the threaded collar or knurled adjuster to bring the vent seal into light, even contact. Do not crank the mechanism down to compensate for a warped sash.
- Cycle the vent. Warm the greenhouse naturally and watch the full motion. Check clearance at the first opening, midway, and maximum travel.
Adjust the opening point patiently
Make one small adjustment, then allow the cylinder enough time to settle at a stable temperature. Repeated turns made within a few minutes can overshoot the desired setting because the wax and metal have not finished responding.
Place an independent thermometer near crop height in shade. Compare that reading with the moment the vent first forms a useful gap. Direct sunlight on either thermometer or cylinder can skew the comparison. The goal is not a perfect number. It is a repeatable sequence in which the roof vent opens before heat becomes excessive and closes without leaving a damaging cold gap.
Do not force a warm opener shut by hand. Disconnect or deactivate it using the manufacturer’s procedure. Forcing the arms against an extended piston can bend the linkage, damage brackets, or rupture the power tube.
Wind, snow, and winter operation
An open roof vent catches wind. Passive temperature response cannot see a storm forecast or close early because gusts are rising. If the manual calls for deactivation in strong wind, follow it and secure the vent with the approved latch only after the opener is disconnected.
Snow adds a separate load. The Canopia manual cited above tells owners to remove the automatic opener and switch to a manual unit when snow may accumulate during winter while the greenhouse is heated. Other brands may use a removable cylinder or locking procedure. Follow the specific manual rather than copying a neighboring greenhouse.
Remove shade fabric, branches, or cords that can snag the moving sash. After a storm, check that the frame remains square before putting the opener back into service.
Routine maintenance
Inspect brackets, fasteners, retaining pins, and springs at the start of the warm season. Clean dirt from pivots, then lubricate only where the manufacturer directs. The Canopia instructions call for light oil on moving parts and grease or petroleum jelly on the piston rod for its model. A different opener may specify another product or prohibit lubricant on the cylinder seal.
Replace a leaking, corroded, or bent power tube. Do not heat a sluggish cylinder with a flame, heat gun, or boiling water. Keep the model number and manual with the spare parts record so the replacement has the correct stroke and thread.
Troubleshooting common problems
The vent does not open
Check the actual cylinder temperature, an engaged latch, missing pin, reversed bracket, insufficient adjustment, and a binding sash. Remove the opener according to the manual and confirm that the vent moves freely. If the piston never extends under a safe controlled warming test described by the maker, the power tube may have failed.
The vent will not close fully
Let the cylinder cool completely before adjusting. Look for debris in the seal, a bent bracket, stretched spring, or an arm that reaches the end of its travel too soon. Use the closing adjustment in small steps. Do not use the opener to pull a warped vent square.
The vent opens too late
Confirm that the adjustment moves in the direction stated in the manual. Check whether the cylinder sits in a cold draft or deep shade while the crop zone heats. If the product’s rated start range is simply too high for the crop, replacement is safer than modifying the cylinder.
The greenhouse still overheats
Measure the total open area and the temperature difference between inside and outside. The opener may be functioning correctly while the greenhouse lacks intake, shade, or exhaust capacity. Ventilation alone also cannot cool below outdoor temperature. Yard Foundry’s garden tools and calculators page can help with fan and heating planning.
Who should buy one?
A passive opener is a strong fit for a small hobby greenhouse with a smooth lightweight roof vent, compatible brackets, and owners who cannot make every sunny midday adjustment. It is less suitable as the only control in a large greenhouse, a very windy site, or a climate where outdoor air is already too hot for ventilation to solve the problem.
Choose the unit whose manual clearly matches your vent and states lift, travel, start temperature, maintenance, and severe weather procedures. That paperwork is more useful than an unsupported claim of universal fit.
Compare automatic greenhouse vent opener specifications on Amazon (paid link).