Disclosure: This page contains affiliate links. As an Amazon Associate, Yard Foundry earns from qualifying purchases.
This is a general layout guide. Final emitter spacing and run time depend on the drip product, soil, crop, pressure, water quality, climate, and bed geometry.
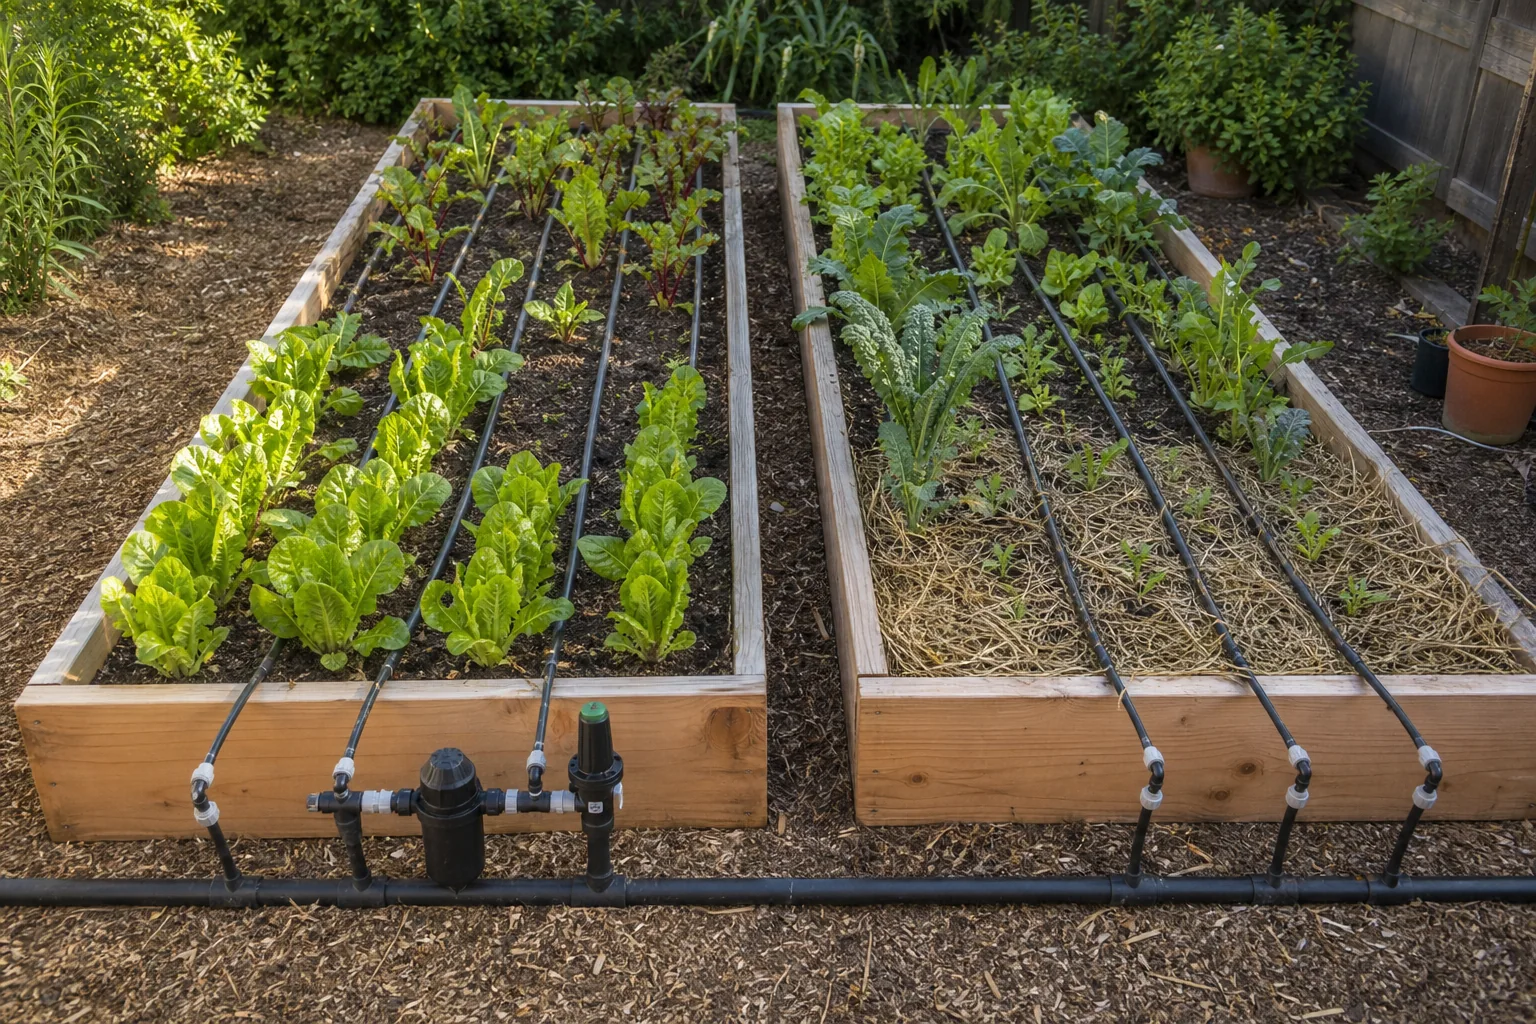
A reliable raised bed drip irrigation layout starts with a filter and pressure regulator, then feeds several short parallel dripline runs from a larger header. For a typical 4-foot-wide vegetable bed, four runs spaced about 12 inches apart are a useful starting point. Adjust the layout after checking how water spreads through your soil.
Start at the water source
Municipal water often needs a backflow device required by local plumbing rules, followed by a filter and a regulator matched to the drip product. A rain tank or pond may require finer filtration and more frequent cleaning because algae and sediment can block emitters.
Check available flow before dividing the garden into zones. Add the flow of every emitter or the published flow per 100 feet of dripline in that zone. Leave a margin rather than designing at the faucet’s best moment of the day.
Use a header and parallel runs
Run supply tubing along one end of the beds and branch dripline across each bed. This arrangement makes individual lines shorter and easier to flush. It also avoids sending water through a single long serpentine route where the final section may receive less pressure.
Provide a flushable end on each lateral or a flush manifold at the far end. Secure tubing loosely enough to accommodate temperature movement.
Spacing for common raised beds
Colorado State University Extension recommends dripline or soaker hose runs at roughly 12-inch spacing in a 4-foot-wide box, giving four runs. Its vegetable irrigation guide suggests fewer runs for large widely spaced crops and a down-and-back layout for many 2-foot-wide beds.
Sandy mixes spread water less sideways than fine-textured soil, so they may need closer line spacing or shorter, more frequent irrigation. Clay-rich mixes spread water wider but accept it more slowly. Dig several small inspection holes after a test cycle and look at the actual wetted pattern.
Inline tubing or individual emitters?
Inline drip tubing suits closely planted vegetables and changing crop plans. Individual emitters work well for widely spaced tomatoes, shrubs, or containers, but they become tedious when every season brings a new layout. Soaker hose is simple, though output can vary with length, pressure, slope, and product age.
Separate beds when their needs differ
Do not place seedlings, mature tomatoes, and an empty bed on one schedule if each requires different water. Small manual valves at each bed provide cheap control. Larger gardens benefit from separate timer zones.
A pressure regulator belongs where its rated flow range will be met. Extremely small zones may fall below the operating range of some regulators, while oversized zones may exceed it.
Mulch and maintenance
Lay tubing on the soil surface and cover it with a light organic mulch when the product allows. Mulch reduces evaporation and protects tubing from sunlight, but keep connections visible until the system passes a leak test.
Clean the filter, flush line ends, check for rodent damage, and replace clogged emitters. At the start of the season, run each zone and watch every line rather than trusting the timer.
Set run time by measurement
Published gallons per hour provide a starting calculation, not the final schedule. Penn State Extension shows how emitter spacing and line flow change the hours needed to apply an inch of water in its drip irrigation run-time guide. Rainfall, mulch, crop size, wind, and soil storage still change the weekly need.
After irrigation, check moisture several inches deep. Lengthen the cycle if only the surface is wet. Shorten it or divide it into separate cycles if water runs from the bed before reaching the root zone.