Disclosure: This page contains affiliate links. As an Amazon Associate, Yard Foundry earns from qualifying purchases.
This guide compares structure, siting, and installation requirements. It is not a substitute for local building advice, and Yard Foundry did not physically test every kit discussed.
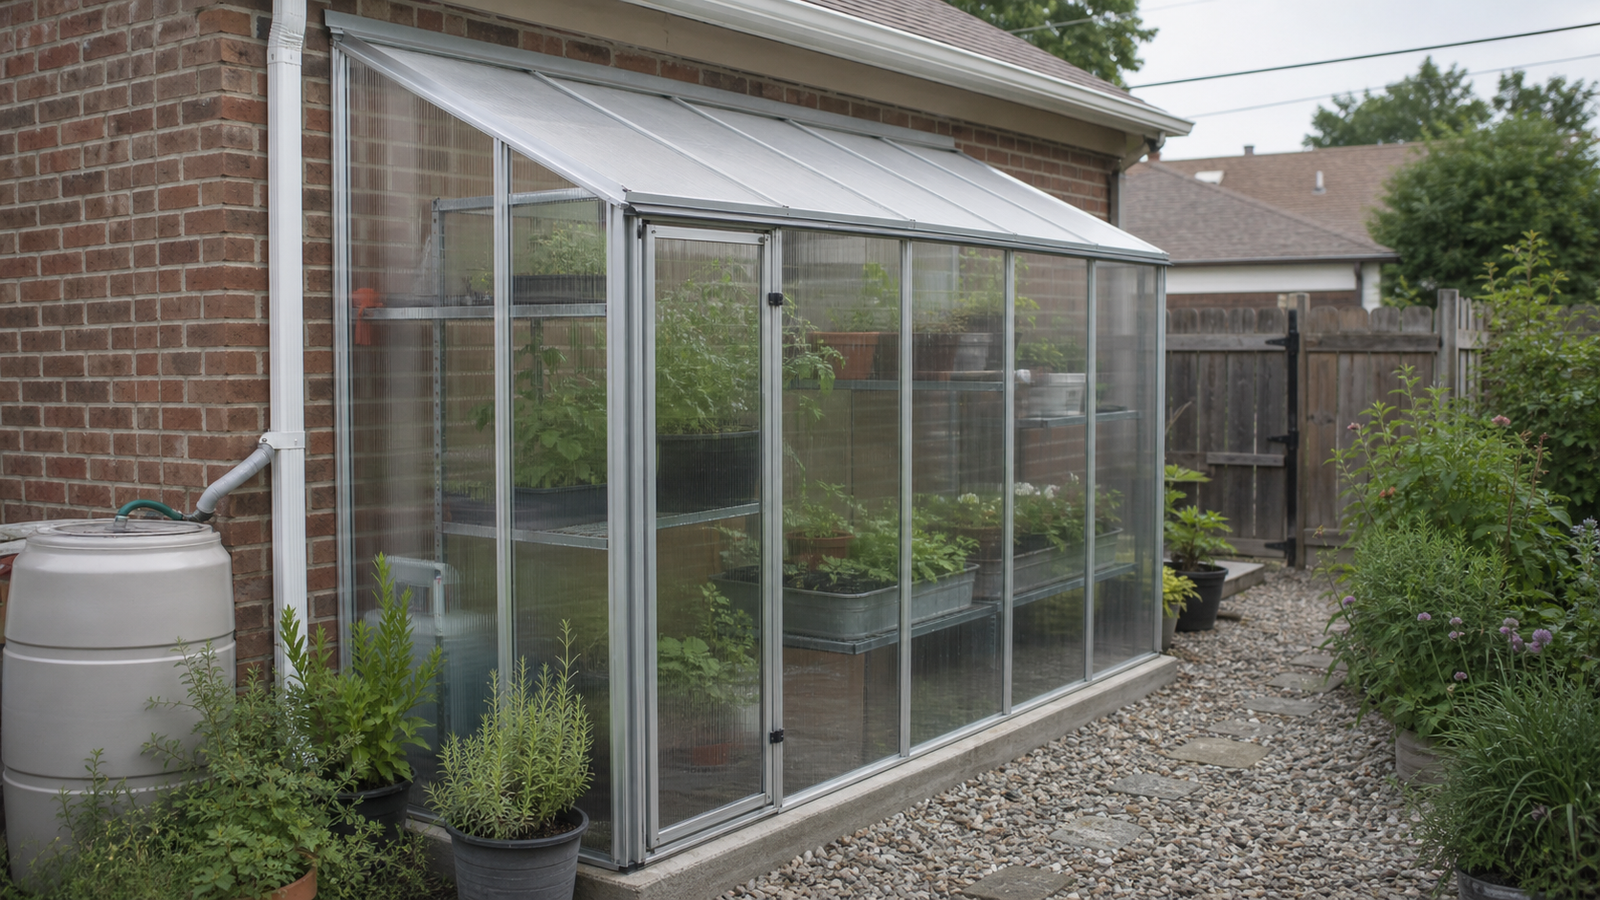
A lean-to greenhouse uses an existing wall as one side of the structure. That sounds simple, and sometimes it is. The wall can shelter the greenhouse from wind, hold a little warmth after sunset, and save valuable yard space. It can also create drainage problems, awkward flashing details, and a very hot room beside your house if the site isn’t thought through.
Before buying a kit, measure the wall, study the sun, and decide whether the greenhouse will be truly attached or simply placed close to the building. That choice affects permits, waterproofing, anchoring, and how comfortable the space is to use.
See current lean-to greenhouse kits on Amazon
Where a lean-to greenhouse makes sense
This style suits a narrow side yard, patio, garage wall, or south-facing section of a house. In the Northern Hemisphere, a south or southeast exposure usually captures useful winter sun. Western exposure can become punishing in summer, especially against dark brick or siding.
Watch the proposed spot for a full day. Nearby eaves, fences, trees, and the building itself cast longer shadows in winter. A phone compass and a few photos taken through the day reveal more than a listing’s broad “full sun” advice.
Attached and freestanding models aren’t the same
Some kits are designed to fasten to a structural wall. Others are freestanding half-greenhouses that sit beside a wall. A true attached model needs reliable flashing where the roof meets the building. Water must run away from siding, windows, doors, and the foundation.
If you rent, don’t want to drill masonry, or aren’t sure what is behind the siding, a freestanding model may be the safer choice. Leave enough clearance to inspect and clean the wall. A tiny gap that collects leaves but won’t admit a hand is a nuisance.
Frame and glazing choices
Aluminum frames dominate this category because they are light and corrosion resistant. Look closely at wall rails, corner braces, and the way the base is anchored. The building wall may support one side, but the exposed face still catches wind.
Twin-wall polycarbonate is a sensible glazing material for most hobby setups. It softens harsh sunlight and retains more heat than a single thin panel. Clear glass looks attractive and resists scratching, but it is heavier and raises installation stakes. Replacement cost matters too, especially if the greenhouse sits below a roof edge where ice or falling branches are possible.
Door placement matters more than it seems
Many lean-to kits put the door in a narrow end wall. Make sure the approach is clear and the door can open without hitting a fence, downspout, or garden bed. Sliding doors save swing room but need clean tracks. Hinged doors often seal better and can accept sturdier latches.
Measure your wheelbarrow, shelving, and large planters. A greenhouse you can’t move equipment into will become a storage puzzle.
Heat, moisture, and the house wall
Warm, damp air is normal inside a greenhouse. It isn’t always welcome against wood siding, trim, or an older masonry wall. Good ventilation protects plants and the adjacent building. Include an opening roof vent, low intake, and a way to hold the door safely open.
Don’t vent moist greenhouse air directly into the house. If you plan an interior connecting door, local building rules and moisture control deserve professional advice. For most gardeners, an exterior entrance is simpler.
Moisture problems are easier to prevent when runoff and drainage are handled at the source. The University of Minnesota Extension gives the same priority to grading, gutters, and downspouts in its building-moisture guidance.
Foundation and drainage
A lean-to greenhouse still needs a level, anchored base. A slab is easy to clean, while a compacted gravel floor drains well and costs less. Timber curbs can work if they are built square and kept away from persistent standing water.
Follow roof runoff during a storm before building. A downspout may need rerouting. The greenhouse gutter should discharge somewhere intentional, not against the home’s foundation.
What is usually missing from the kit
- Wall-specific fasteners and flashing
- A finished floor or perimeter foundation
- Automatic vent openers
- Shade cloth and summer ventilation fans
- Shelving sized for the exact wall height
- Sealants compatible with both the greenhouse and the building
Add these items to the real project budget. The shell price is only the starting point.
How to compare lean-to greenhouse kits
We would choose a kit only after confirming the exact wall height, roof angle, door clearance, anchoring method, and replacement-panel availability. A published wind or snow rating is especially useful. If the seller can’t provide a clear installation manual before purchase, that is a reason to pause.
A freestanding full greenhouse may be easier if the wall has windows, vents, electrical equipment, or complicated roof drainage. Compare the tradeoffs in our polycarbonate greenhouse kit guide.
Bottom line
A lean-to greenhouse is a clever use of a difficult space, but only when the building connection is treated seriously. Spend time on drainage, ventilation, and anchoring before debating shelves and plant layout. Those quiet details decide whether the structure feels integrated or improvised.